The 42DD kit is quite complete and addresses several deficiencies in the stock shift linkage. First up are the bushing inserts themselves which remove the slop from the soft rubber bushings in the cable ends. Then there are the bolts used when reassembling which are used to reinforce the plastic shift linkage. If you move the shifter around whole observing the plastic linkage you can see the upper and lower pivots both flex just a bit. With the supplied bolts installed this is completely eliminated.
With an additional helping of Mobil 1 synthetic grease and Tri-Flow the transmission is now very smooth, light and direct. This eliminates all vagueness and slack and also all of the notchiness that the car had when delivered. This gets the shift feeling very close to how my mk1 was (except for the uber-short throws) and I'm very satisfied with it now.
42DD has a TTRS specific kit but it is slightly hidden, here's the direct link.
The install is pretty straightforward but I've had past experience doing similar mods on mk1 TTs and a mk4 R32 and this was all very similar. The front-back linkage is maybe rated a 2 on the difficulty scale and I'd say this is maybe a 6. The really tricky part is getting the shift linkage properly adjusted and that requires access to the center console. I mostly followed this excellent youtube video for the install.
As always, these are the steps that worked for me on my car, there may be running changes in production that mean things are different for you so be sure to read through this all the way before starting. Also, if you're not comfortable drilling holes in your shift linkage assembly or with adjusting the alignment then take it to a shop, it really should only be an hour or two for the install.
Alright, so with all of that out of the way....
First step is to make sure you can actually get to the shifter assembly so that you can do the alignment procedure which will be key later on.
Actually, scratch that, the first step is making sure you have an alignment tool. I've got an original alignment tool from Dieselgeek which turns out to simply be a nail :) But not just any nail, one with a shank thickness of 5mm. This is critical as this will act as a pin to line up two holes on the shift lever. Too thick and it won't fit, too thin and it will be loose and you're adjustment will be off.

For this install we used a 5mm hex screw with threads just at the tip. It needs to be about 4" long and have a slight bend in it. Like I said, this gets a bit more complicated than the other install:)

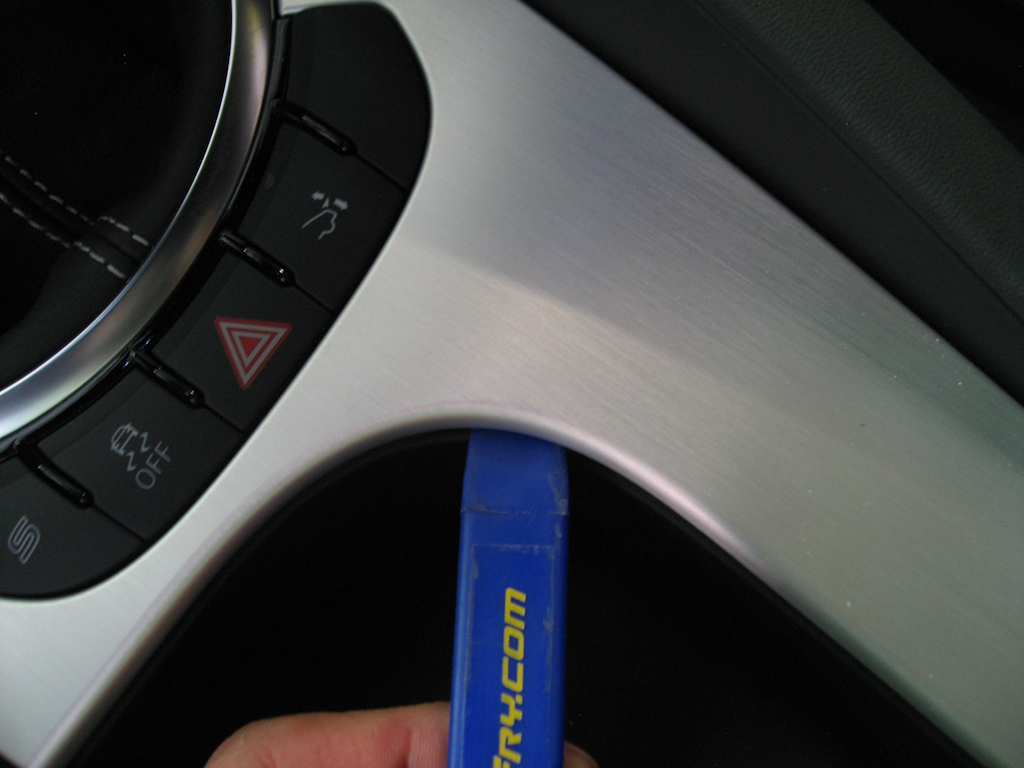
Ok, if you've got your special tool then you can proceed with taking the interior apart. Oh, you'll probably want some nylon trim tools for this although a screwdriver wrapped in electrical tape may work too. You must be very careful here when prying the trim off that you don't scratch any of the surfaces. Cover it all in painters tape if you feel more comfortable but work slowly and carefully!
The aluminum trim around the shifter is held on by 7 clips. Start at the skinny end near the handbrake. When you slide the trim tool in you'll find a gap where you can get in a bit further and pry up.

Once that corner is released you can start working your way forward and find the next gap.
Then I was able to get my fingers under the edge near the buttons and lift the next couple of clips free. You don't need to use a ton of force to do this but I never felt like the piece was going to break or bend.

With that edge lifted I was able to get the trim tool in a bit further to release the next pair of clips.

And once those were free the remaining clips lifted off without too much additional effort. At this point you'll need to disconnect the cable for the buttons. This has a small release tab to press and then it slides out. It is by far the friendliest electrical connector I think I've found on a TT, thank you Audi for improving these!

So here's what the bottom off the center console looks like. You can see some of the gaps that you're prying between and also how it is reinforced.
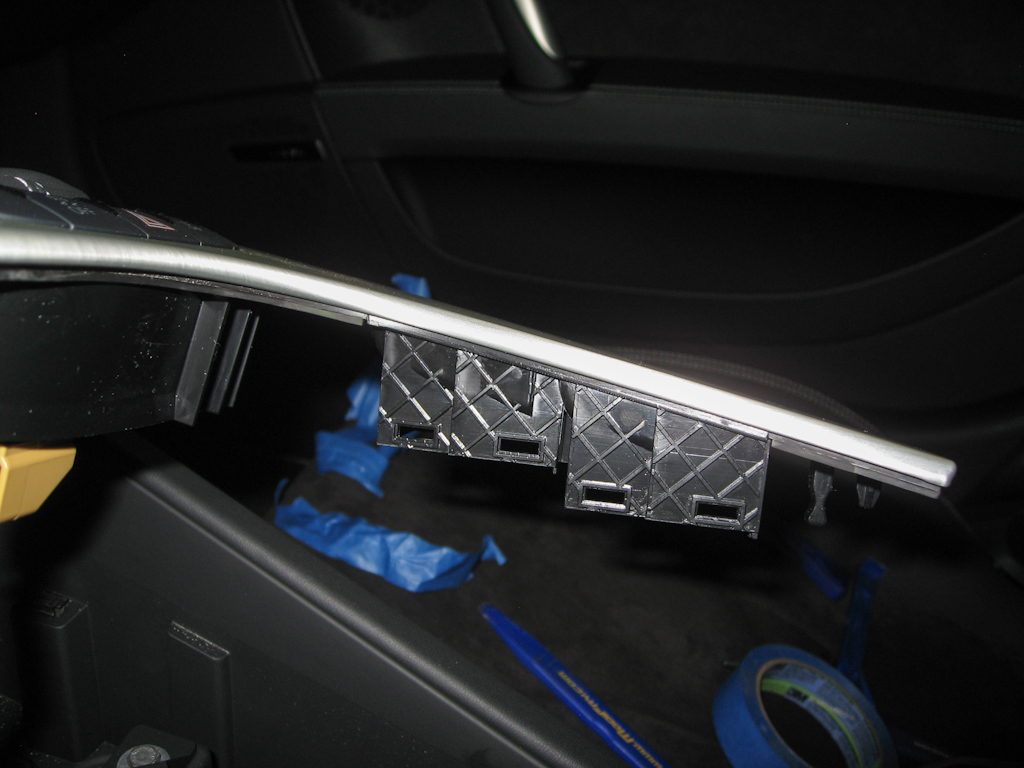
You should be able to lift the center console trim straight up. It's still attached to the shift lever via the hose clamp holding the shift boot on. I never removed that and just let it all hang. It gets in the way a bit but it's easy enough to work around. If you've done this mod on a mk1 TT you'll definitely be missing your old car about now. 8 torx screws and you'd be in and done with complete access.
At this point I wrapped all of the edges and sharp points on the center console so that it didn't accidentally scratch any of the rest of the console or the MMI screen.
It's probably worth test fitting your special tool now too just to make sure it'll fit in the alignment holes. Removing the cable ends from the transmission is kind of the point of no return so do this now. With the console pulled out of the way you can look down and see the metal alignment hole on the shift lever. If your alignment tool can slide into that first metal ring then you should be fine.

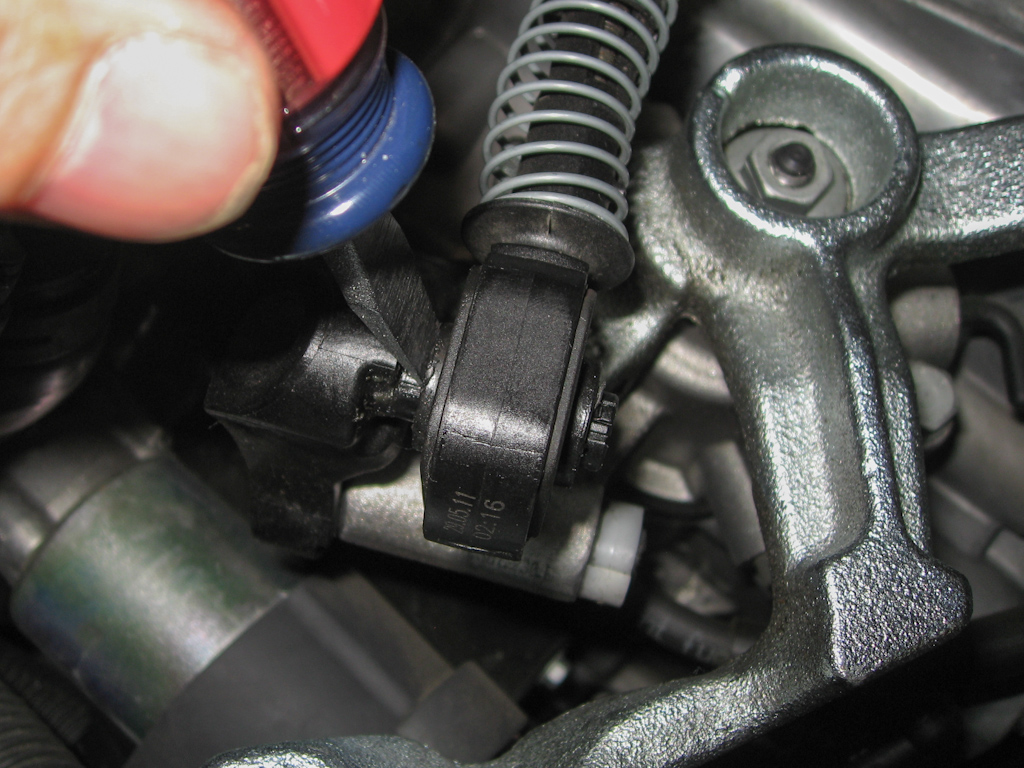
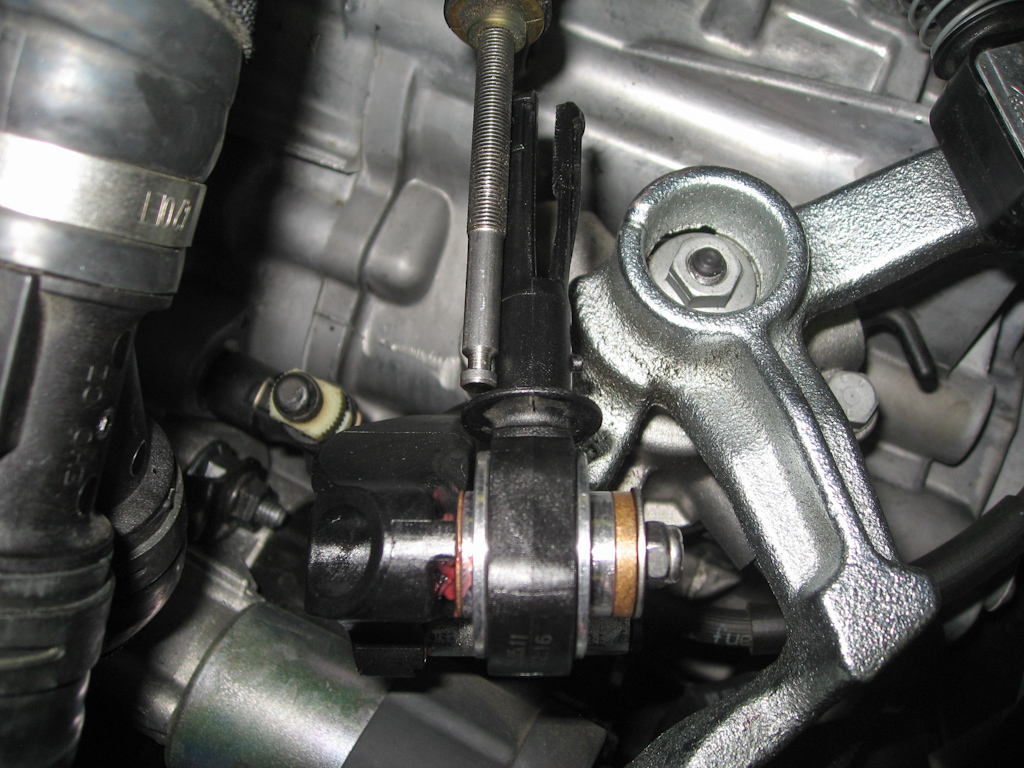
Alright, so back under the hood. If you haven't already done so go ahead and remove the airbox to get access to the top of the transmission. My other writeup shows how to do this.
You'll be working on the plastic side-side linkage so you'll need to unclip the plastic retainer at the bottom that holds the linkage at the lower pivot. This will just slide right out without much force.

And then you can remove the cable end from the upper pivot. There's a nub on the post that you need to force the cable end over but it comes off easily by prying with a screwdriver or a pair of pliers.
Then you should be able to slide the linkage off of the transmission for the remaining minor surgery. Here you can see I've already shaved the nub off with a razor blade. You'll need to do this to reassemble with the 42 DD replacement bushings.
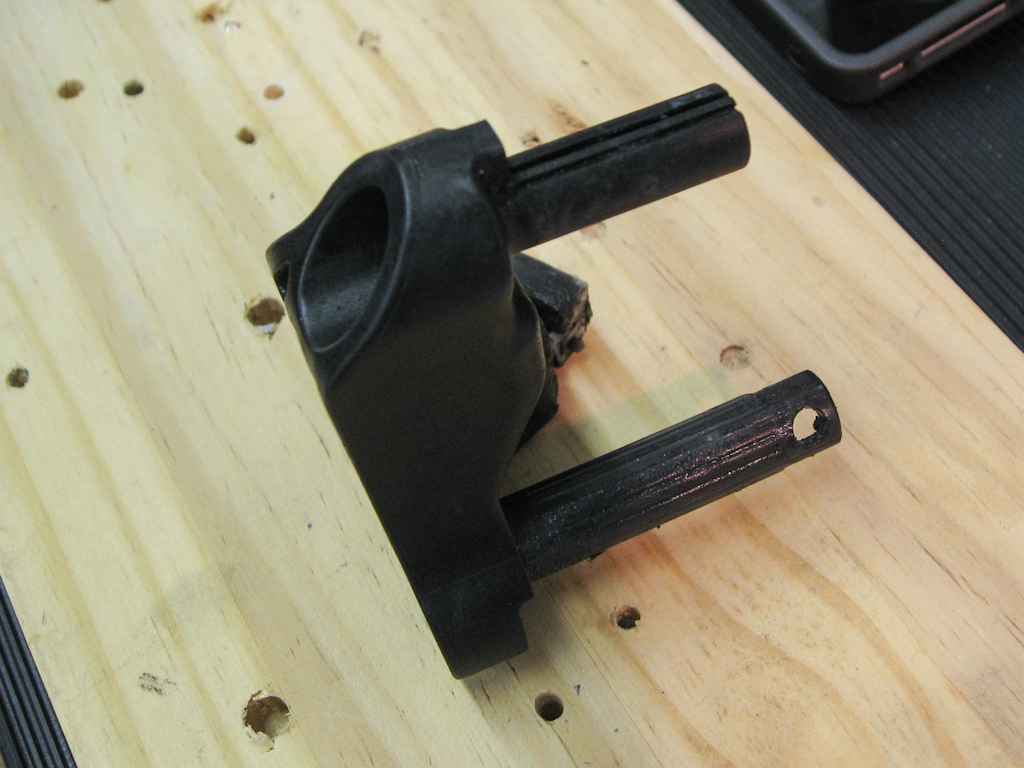
You'll need to drill two holes with the supplied drill bit, one down each post. Use the posts as guides and drill as straight and as cleanly as possible. These just need to be large enough to pass the supplied bolts through.

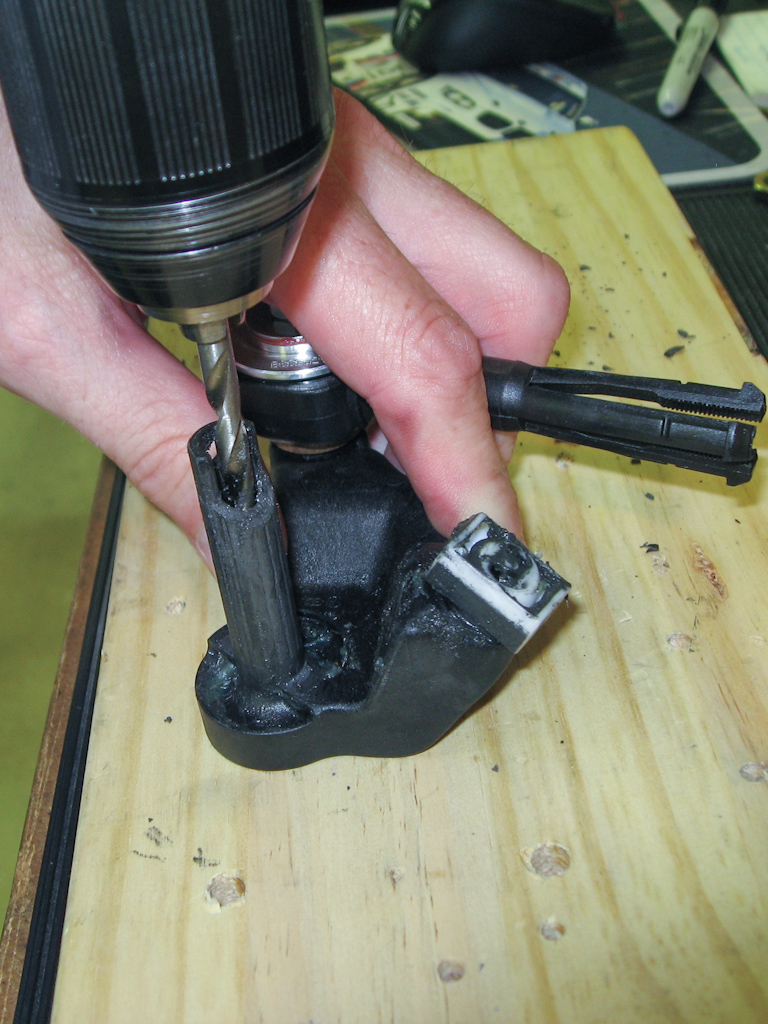
Then the final bit of surgery is to cut the lower pivot down so that it will fit with the supplied end cap. You'll want to make an initial cut about at the end of the curved part. What you're aiming to do is have this post be long enough so that with it inserted into the transmission housing that it bottoms against the supplied cap just enough to have a slight gap to ensure that it can pivot smoothly. If you leave the post too long you'll have too much slop, if you cut the post too short then you won't have any gap and when you tighten the lower bolt this pivot won't be able to move at all. This will make a lot more sense when you're standing over your car with a dremel or hacksaw :) I should add that we started with a hacksaw here but finished with a dremel, the plastic is very hard. Also, you want this to be as straight as possible so that it sits flush against the end cap.
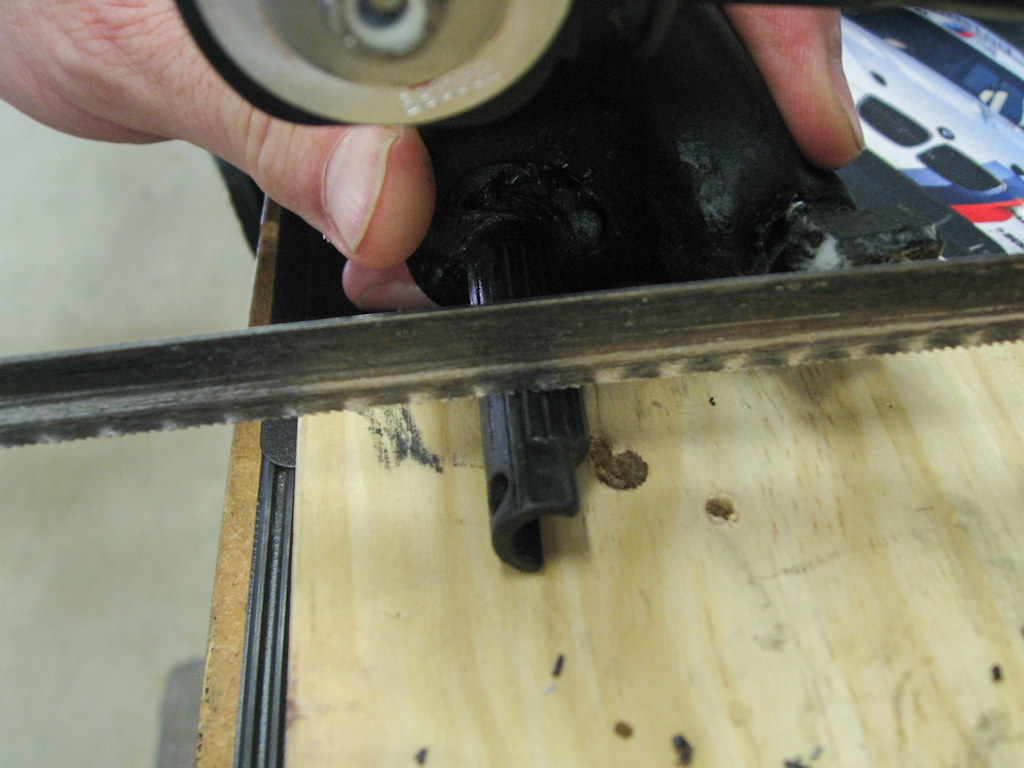
Here you can see the linkage reinserted with the end cap in place. The bolt head (4mm allen) fits inside this cap and you secure the other end with the supplied lock nut and washer with a bit of loctite blue. Do not over tighten this, you want this to be able to pivot freely. Any bind in these parts will be transmitted directly to the shift lever and affect shift feel.

So now on to the cable end itself. You'll need to remove the cable end from the cable to proceed. This is simply done by squeezing the spring with the retaining ring and locking it into place. Be careful here, I almost dented my hood by launching the retaining clip off of the cable end, there's a decent amount of spring tension :)

Now you'll need to remove the rubber bushing. The video says that this is glued into place and that simply prying it out will remove it. Not so for me, this was more like the mk1 TT cable ends which have the rubber molded around some plastic arms. We did break one of the arms trying to pry the rubber out but you'll see that these don't really locate the replacement bushings so this isn't too horrible. What worked for me was to use a couple of sockets and a bench vise to force the middle plastic part out of the rubber and then I was able to pretty easily tear the rubber out. On my mk1 I just used a razor blade to cut the rubber bushing enough to pull it out. When it's out you're left with this.

Now the Australian video said to install the 42DD parts with the thicker washer and insert towards the arm but when I did that it was clear that the alignment of the cable was quite different on the TTRS than on the Polo (?) they were working on. So, I simply swapped all of the bushings around to keep the cable in a happier aligment. Here you can see I have from left to right: the thin brass washer, the thin insert, the thick insert, the thick brass washer and then finally the normal washer all capped off with the lock nut (again with some loctite blue for insurance).
With the cable end reinstalled it's now time to do the cable alignment procedure. Start with the transmission in neutral. Keep the spring clip released on the linkage you were working on and release the other one as well. This should allow the shift lever in the car to move independently of the transmission.
What you'll be doing is locking both the transmission and the shifter into known calibration positions and then reconnecting the cables. If done correctly this gets everything nicely lined up for smooth shifting.
A word of caution here: You're about to insert a plastic pin into your transmission housing to lock it into the calibration position. If that pin breaks off inside the housing you are kind of screwed so be really careful :)
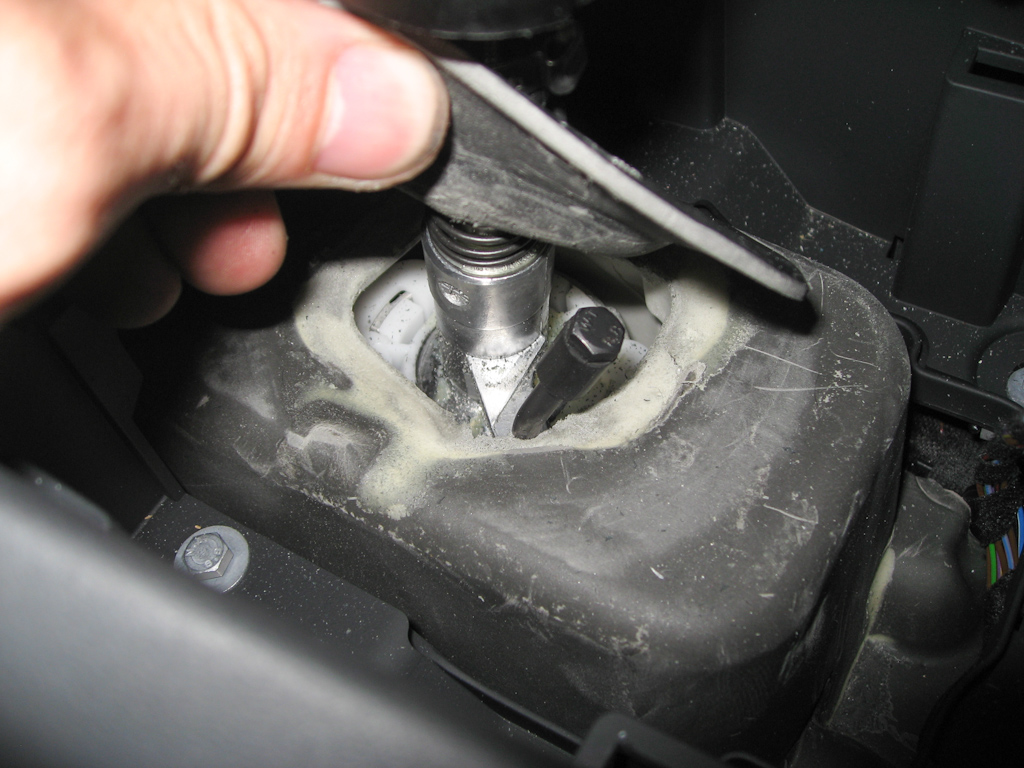
That said locate the pin just under the transmission linkage, it's a small L-shaped plastic piece. This will need to be slid into the transmission to lock the linkage in place.

You do this by gently pushing the pin into the transmission housing while gently lifting up on the linkage assembly. Note that you'll need to have the transmission in neutral while doing this so that the linkage can move up and down. If it's in any gear then it won't be able to move. When it has found its happy place the pin will slide all the way in and pivot with the L facing up.

So now that the transmission is in its calibration position you can do the same with the shift lever. Find those two holes again and now you'll want to slide the alignment tool in so that it slides into both holes.
Now both ends are in their calibration position and you can lock the cable ends back onto the cables. I generally smack the cables around and shake them lightly to make sure they are not bound on anything. Then just release the two spring clips so that the cable ends can lock back onto the cables.
Now would be a good time to release the calibration pin from the transmission, gently sliding it back out and making sure that it is all the way free. Then remove the alignment tool from the shift lever.
Carefully make sure you can select all gears, including reverse. If you can't, or if it feels particularly notchy then restart the alignment procedure. Do NOT force the lever into gear if it doesn't want to go.
Before bolting everything back up you may want to take a final opportunity to hit all of the moving parts with some Tri-Flow. We also sprayed some down the cables themselves by removing the dust boot on the side-side cable and by making a small hole in the dust boot on the front-back. A little extra lube is always a good thing :)
Back in the car you can reinstall the center console.
Note: You may want to hold off on doing this until you go for a short test drive just to be sure everything is working correctly.
Don't forget to first reconnect the cable for the buttons and make sure the wire is tucked out of the way. I think for me this was the hardest part. I tried to halfway insert the metal clips and then push the posts from the console into them but that didn't work so well. In the end I just pushed the metal clips all the way into the body and then popped the posts into them. One part to watch out for while doing this is the cup at the front of the ebrake handle. If this isn't held out it can slide under the center console piece, It needs to catch the lip of the center console so that it is held correctly in place.
Then make sure everything is buttoned up and take it for a spin. Take it easy on the first couple of shifts to make sure all 7 gears engage cleanly.