Please refer to the instructions that came with your FMIC for specific details and to the factory manual for reference on how to remove the bumper. Also please read thru all of this guide before starting so you're not surprised midway thru. Finally, regardless of where you got the intercooler from make sure that it is completely free of any debris that could make it into your engine. Use a vacuum, air compressor or some other way to blow/flush it out.
The install is actually pretty straightforward and there should not be any need for special tools. First timers will probably take a few hours if you haven't pulled the bumper off but after doing 6 or so installs I can knock this out in about an hour now.
You'll need:
10mm socket
10mm deep socket
T25 torx
T30 torx
Some prying implements
Wrenches and extensions
triple square sockets for the crash bar (might not be required, pretty sure these are M14)
Start by putting the front end on jack stands and remove the front wheels. Make sure the car is safe and secure before going any further. You'll need the wheels off to gain access to the inner fenders to remove the bumper.
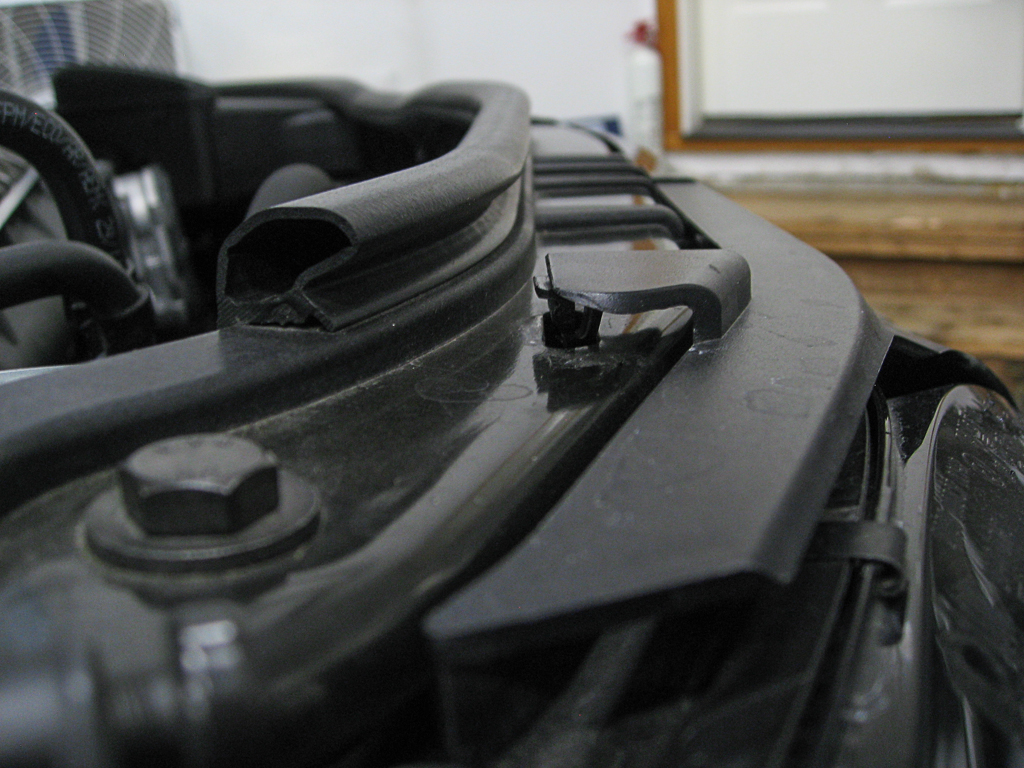
Remove the four T30 torx screws that secure the bumper up top. Two of these are visible on either side of the hood latch, the other two are under the plastic trim pieces that flank the grill. Note that these screws are inside of squares molded into the plastic. These are to help align the bumper when reinstalling so take note of where the screw heads are in relation to the boxes before removing them.
Removing the two trim pieces is probably the trickiest part of the install as they have stiff plastic catches that need to be released. The first tab to release is up top and outboard and you can just release by hand.
The next two tabs are harder to get to and will fight a bit. The manual says to pry from between the headlight lens and the trim piece by lifting it out with your hand, careful not to damage the headlight! I was able to pop the top one out pretty easily this way and then used a screwdriver to release the lower tab by pushing down on it.
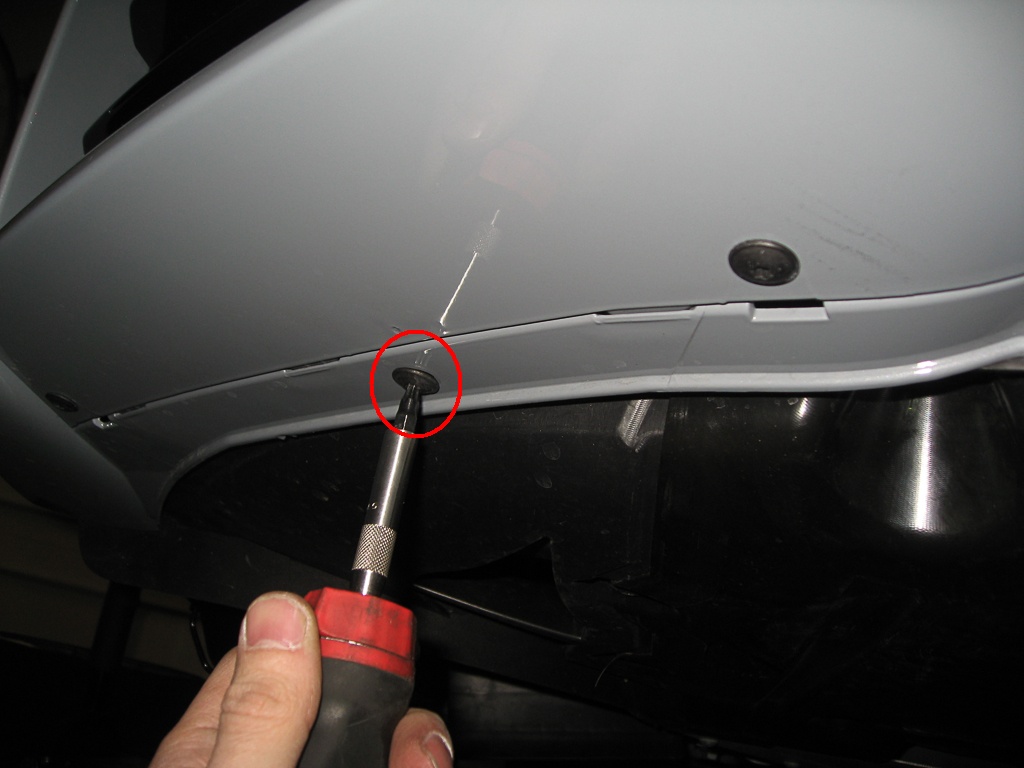
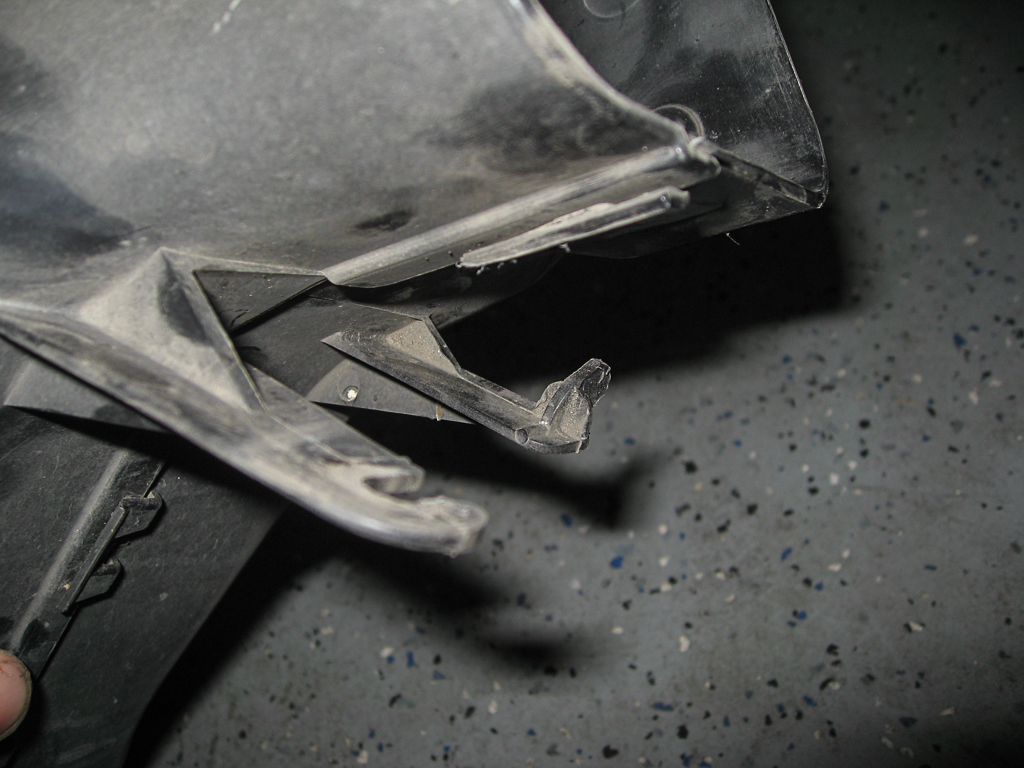
Here I've circled the tabs and where they insert into the bumper. You'll note that they face in opposite directions which makes it a bit tougher to get out. The lower one is the trickier of the two and you should be able to slide a screwdriver in thru the gap from the top and press down to release it as shown in the second picture.


Next remove 7 T25 torx scews from the bottom of the bumper. 5 of them are in the center and secure the plastic undertray to the bumper. The other two are under the side intakes and hold the bumper to the fender liner.
Then remove the various T25 torx screws in each fender liner including the 6 or so that secure the spoiler forward of the tire. Some of these are different lengths so keep track of where they go. In general the longer screws secure the spoiler.
You'll need enough of these removed so that you can fold the fender liner back as shown in the second picture. Note that there's a plastic piece glued to the backside of the fender liner (on each side).


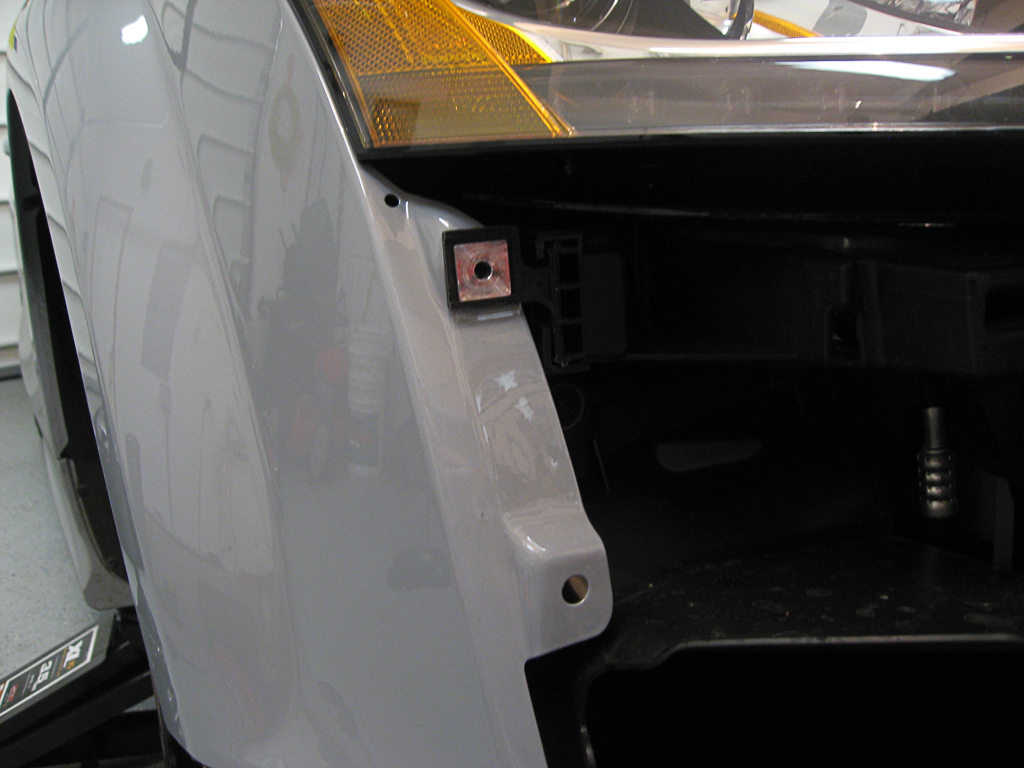
Now there should just be four 10mm nuts securing the bumper to the front fenders. These are set in deep and will require a deep socket. They're clearly visible on the driver side but you'll need to poke around the coolant lines supplying the radiator on the passenger side. I prefer to use 1/4" drive tools here just because clearance is a little tight.
The lower sides of the bumper are clipped into place at the bottom of the fender and should pop out with light pressure.


That should cover all of the physical connectors holding the bumper on. Pull it straight off of the body so that the four studs clear the mounting holes in the fender. If you try to do one side at a time it will bind up and get stuck.

A second person can be a huge help here as it's a large piece and can be tricky to maneuver around.
I should also caution that the bumper is tethered to the car by the headlight washer hose. This will limit how far you can move the bumper but it's attached at the driver side so you should at least be able to pivot the passenger side out and away to gain access to the front of the car.
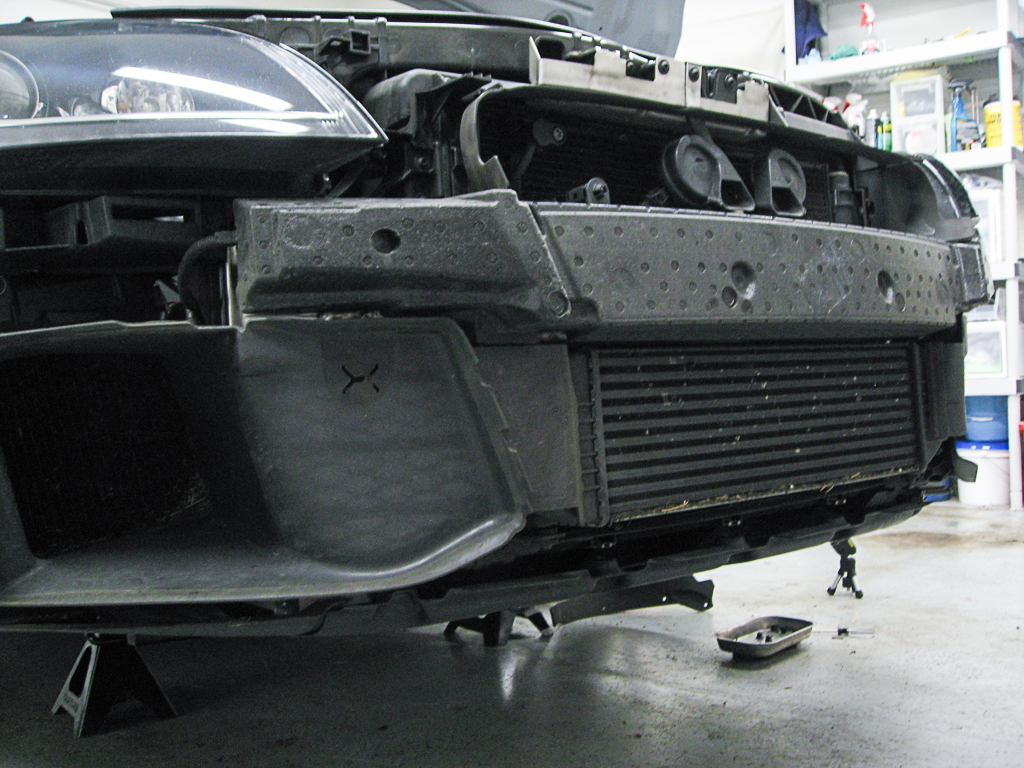
You should now be left with this and may choose to stop here as the lack of a front bumper will provide sufficient cooling to not require an FMIC upgrade.
No, not really. Do not drive around without a front bumper.
Now you can remove the side air ducts to gain access to the hose clamps on either side of the FMIC. On the passenger side you just need to remove the lower 2 T25 torx screws.The upper screws don't actually need to be removed as those are grommets that the duct just slides into place. Thanks Audi! (please excuse the accumulation of dead bugs) The second and third pic shows the upper grommets, leave those in place.

The driver side also has 2 T25 torx to remove although one is a bit more of a reach to get to. Audi has again been kind and slotted the piece for easy removal. Get the front one out first.
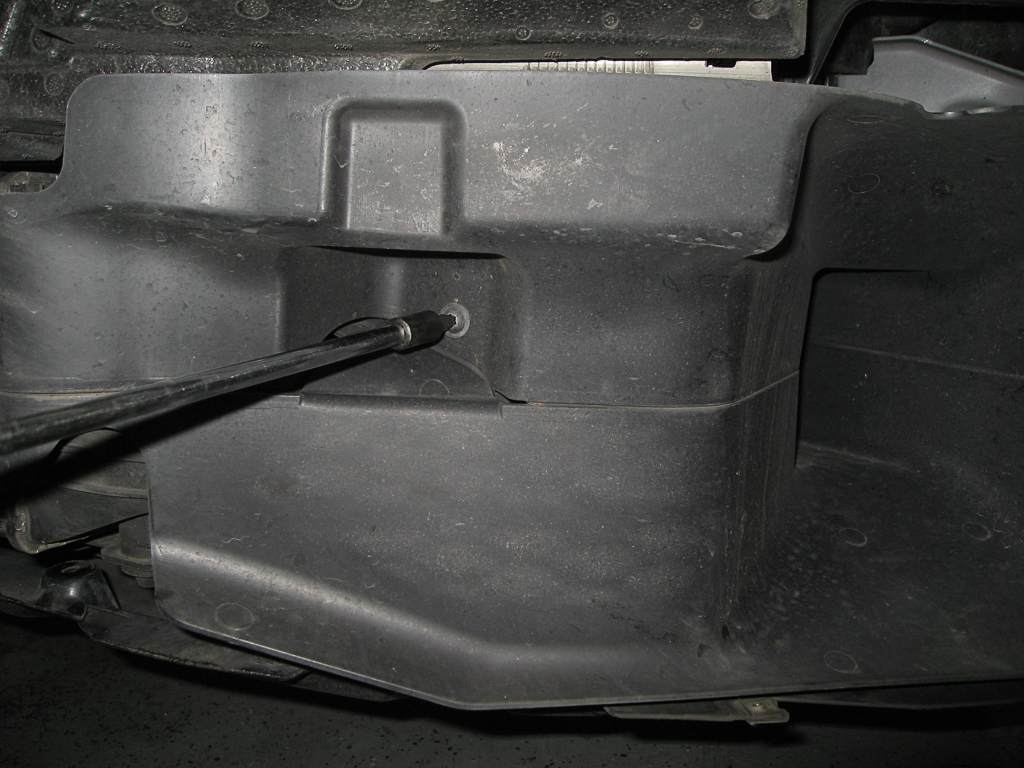
The other one is tucked back in and secures the duct to the aluminum core support.

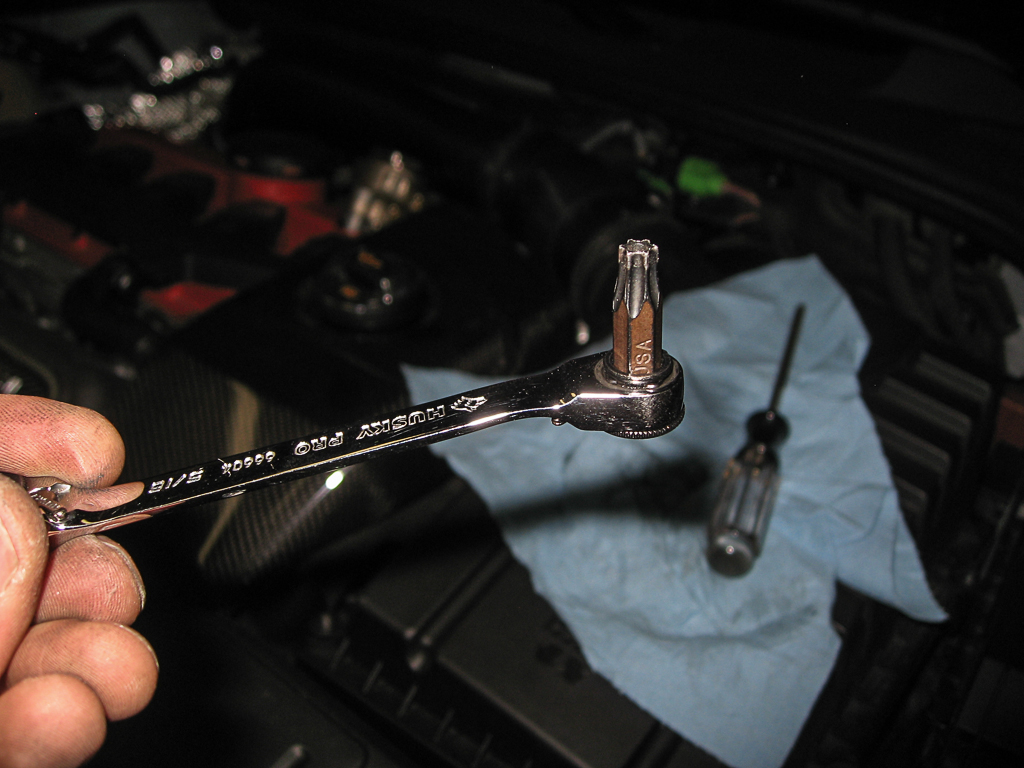
You can go straight in thru the fender or if you have a tool like this you can access the screw from the front. You do NOT need to remove the screw all the way, just loosen it.

The top piece is slotted to slide up off of the screw and the bottom has a locating pin that slides down into the aluminum bar. You should be able to leverage it up out of the hole easily.
Note that prior to reassembly I shaved a bit of material off of that pin to make it easier to insert into back into the hole.


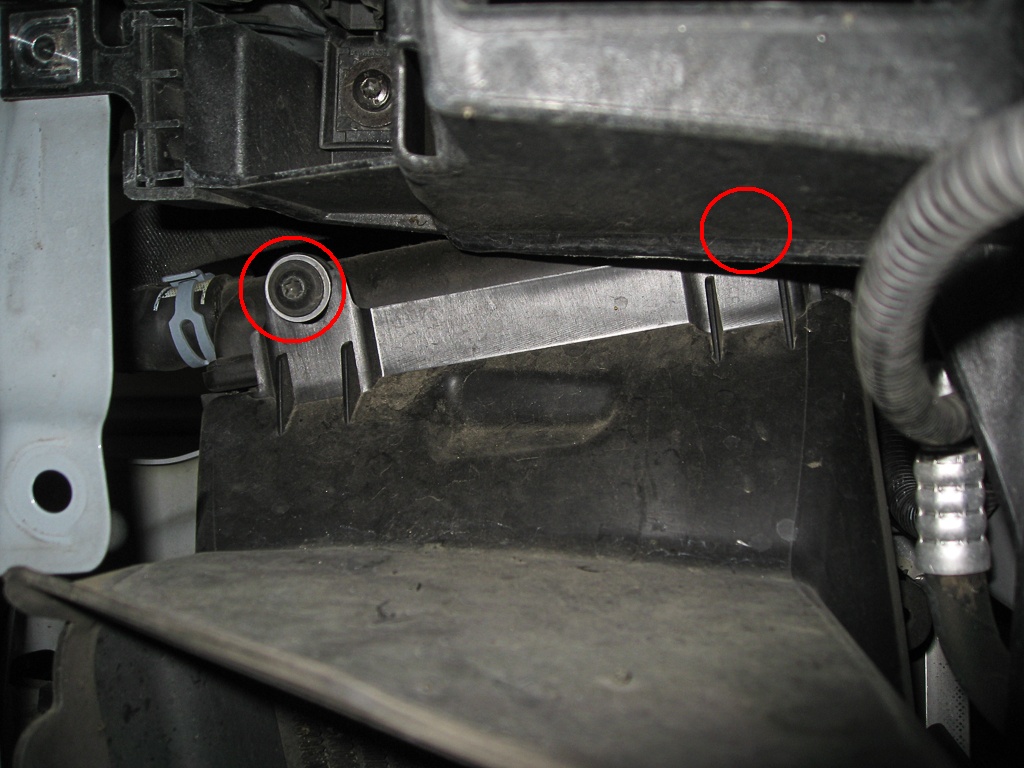
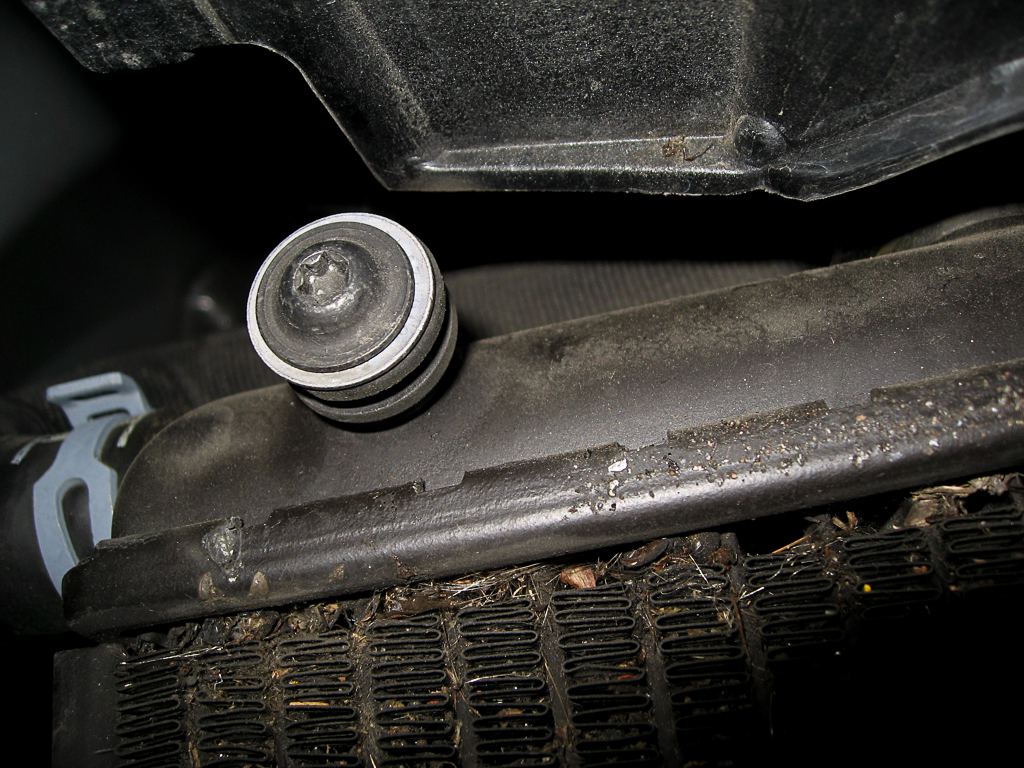
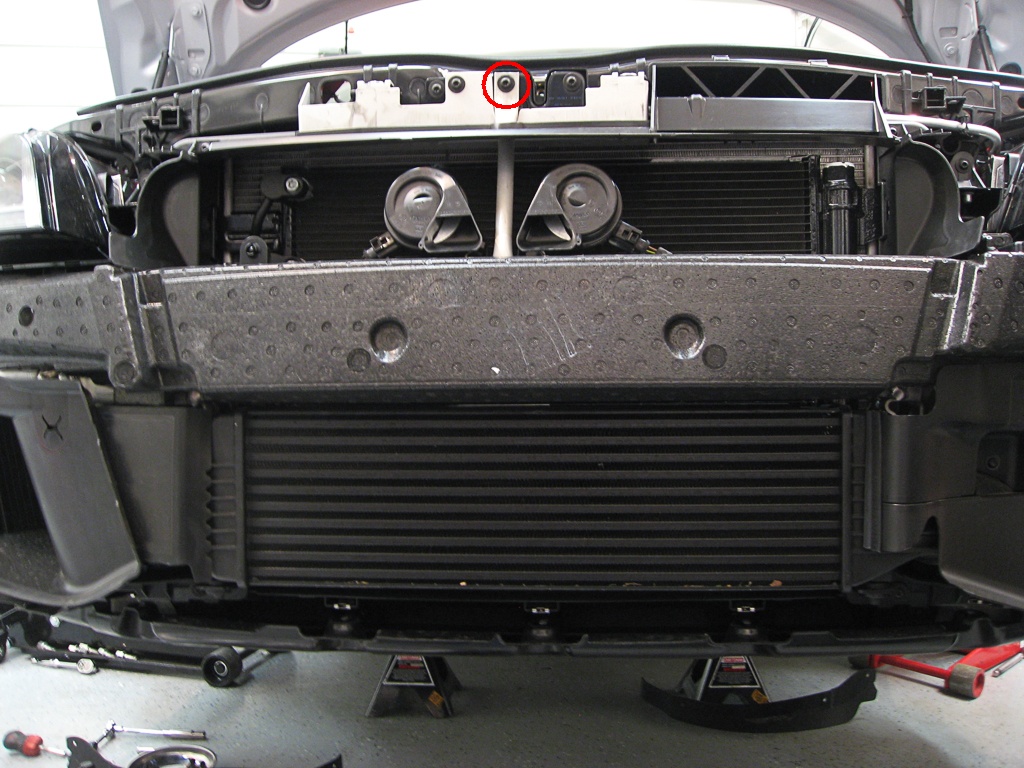
Loosen the hose clamps as much as possible to make it easier to pop the intercooler out and then start on the fasteners that hold the FMIC in place. The FMIC is hung from the crash bar at the top by two bolts and then at the bottom there are just two locating pins that fit into the core support (circled in pic 2). All four points have rubber grommets to isolate the FMIC from the body. Remove the two bolts with a 10mm socket.


Now just grab the FMIC from the top and pivot it forward and out of the core support and hoses. It should come out easily. If it's hung up on the hoses then loosen the clamps more. Swap the rubber grommets from the stock FMIC to the new unit. Some silicone spray can be helpful here.
For details on installing your new FMIC consult the instructions that came with it as there will likely be steps that are specific to each brand. You may need to replace hardware, trim some plastic tabs or rearrange other parts.
NOTE!! You should be sure to cover the hoses on the car and the end tanks on the FMICs while working so that any material that needs to be trimmed doesn't inadvertently end up in your intake tract!
If you need to remove the crash bar for any reason you'll need to remove the foam cover on the top part of the crash bumper first. Be sure to disconnect the homelink box on the driver side and the air temp sensor and horns in the middle. You'll need to remove the 8 M14 triple square bolts that secure the crash bar to the unibody. And finally the horn bracket support is a T30 and a 10mm nut. Getting the crash bar off is a bit tricky as it is held on locating posts that restrict it's movement and there is tight clearance above with the drains from the headlights.

Prior to installing the new intercooler make sure there is nothing in either of the boost hoses or in the intercooler itself that could be ingested into the engine.
Installing the FMIC might be easier if you put the lower grommets into the holes in the core support and then drop the FMIC into them. Get those lower pegs into place and rotate the FMIC into position, guiding the end tank pipes into the hoses. Reinstall the two upper bolts that hold the FMIC to the crash bar first and then tighten the hose clamps, making sure the hoses are seated onto the pipes as far as possible to minimize chances of them blowing off under boost.
If everything else looks good you can start reassembly by reinstalling the left and right air ducts. Then put the bumper back on. A second set of hands is really pretty much required here to make sure you can get the four studs into the holes in the fender. You may choose to use painters tape to protect the headlights and the areas around the fenders while reinstalling. Go slowly and make sure that everything is lined up and no parts of the bumper are impacting the new FMIC.
You may choose to start the car and check for obvious leaks at this point but more than likely you'll need to get some boost into the system to know for sure.
Once everything fits to your satisfaction you can reinstall the 4 10mm nuts that hold the bumper to the fenders and clip the lower portions of the bumper back in place. Then the four upper T30 screws, lower T25 screws and all of the fender screws. Pop the wheels back on and torque the lugs and set it all back down on the ground, gently, and take it for a test drive.