The brace is really nicely made, high-quality powdercoat and the fitment with regards to aligning with the fasteners was spot on. If I had gotten the TTRS kit with the spacers that would have been perfect. I haven't had enough chance to really drive it to form any thoughts on handling improvements yet; the car maybe feels a bit stiffer through transitions but I need more time with it to really see as all I've done since install is some highway miles. Theoretically this will stiffen the unibody and help the car resist any sort of twisting, helping the suspension work better and maybe adding some responsiveness to the steering. This is really just the start of a series of mods I'll be doing to stiffen the car prior to installing the MSS kit later this summer.
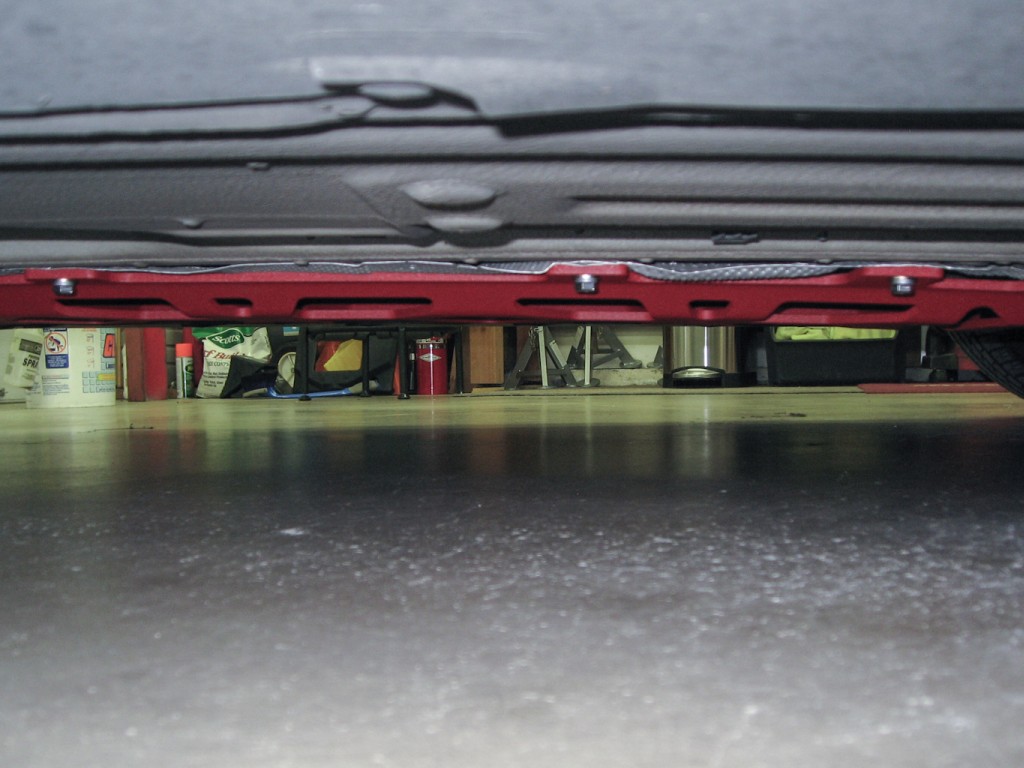
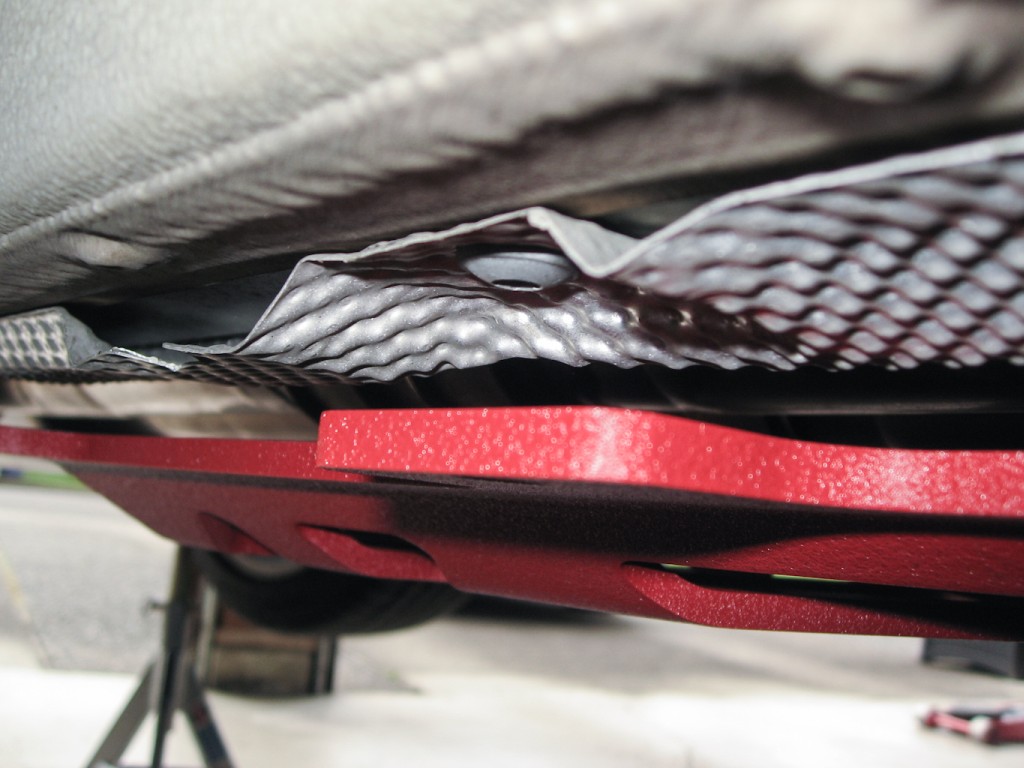
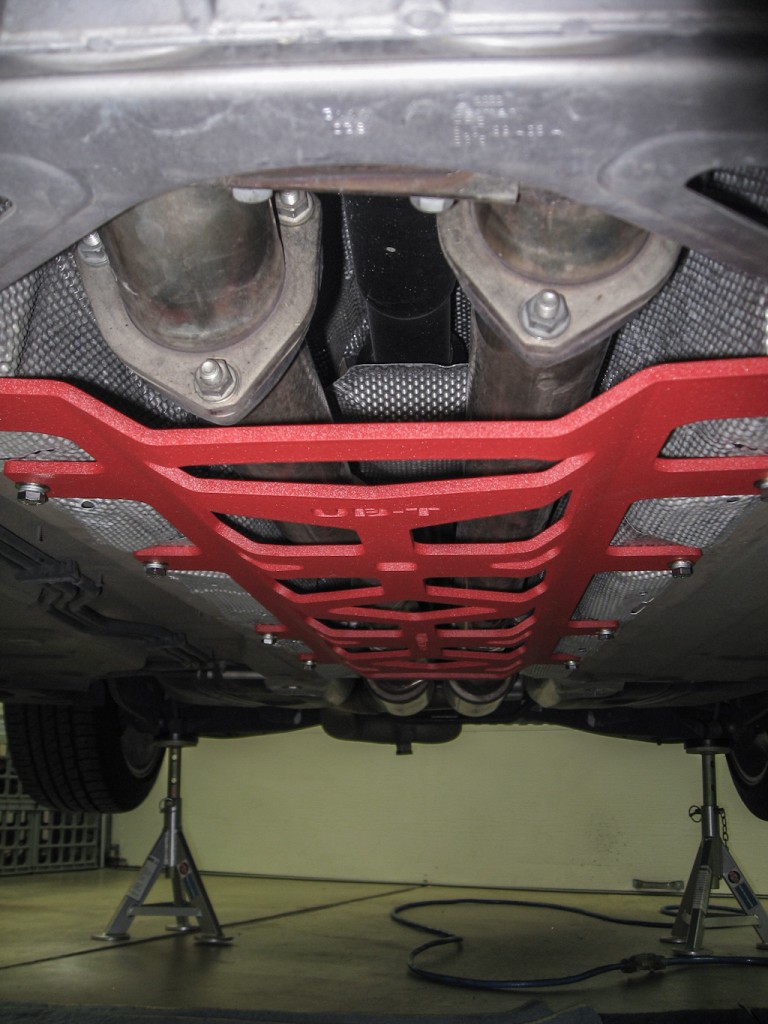
The brace bridges the transmission tunnel and ties in at 10 places using existing mounting holes for the heatshield in the transmission tunnel. It covers basically the entire tunnel except for maybe the final 6-8 inches before the resonators.
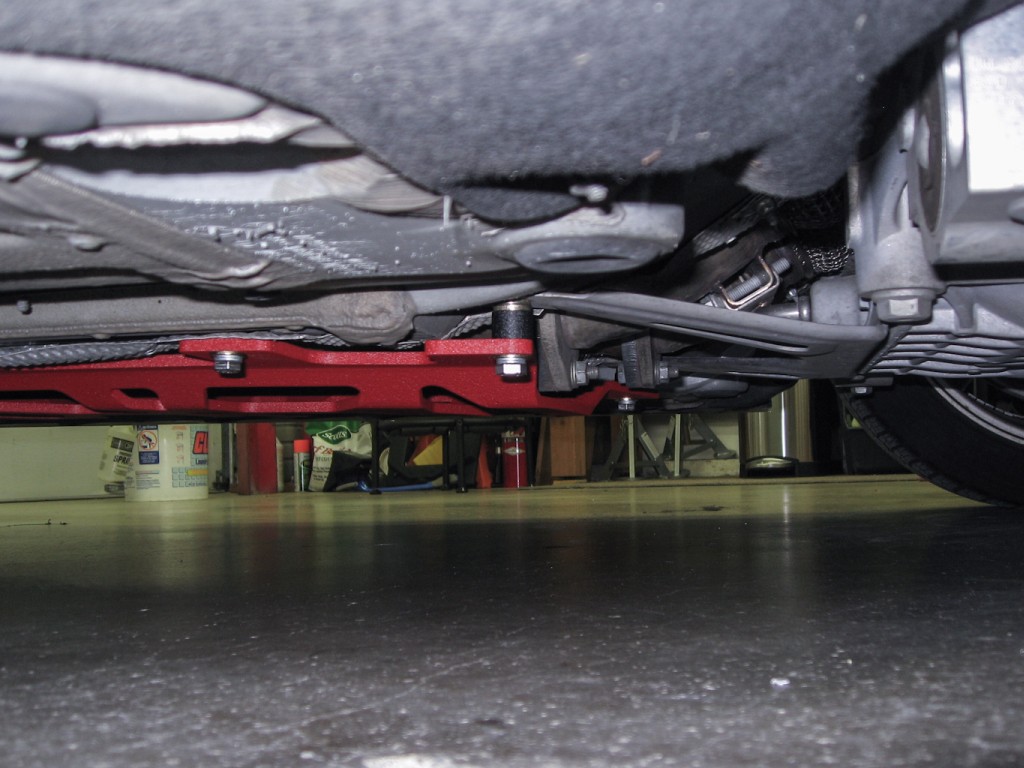
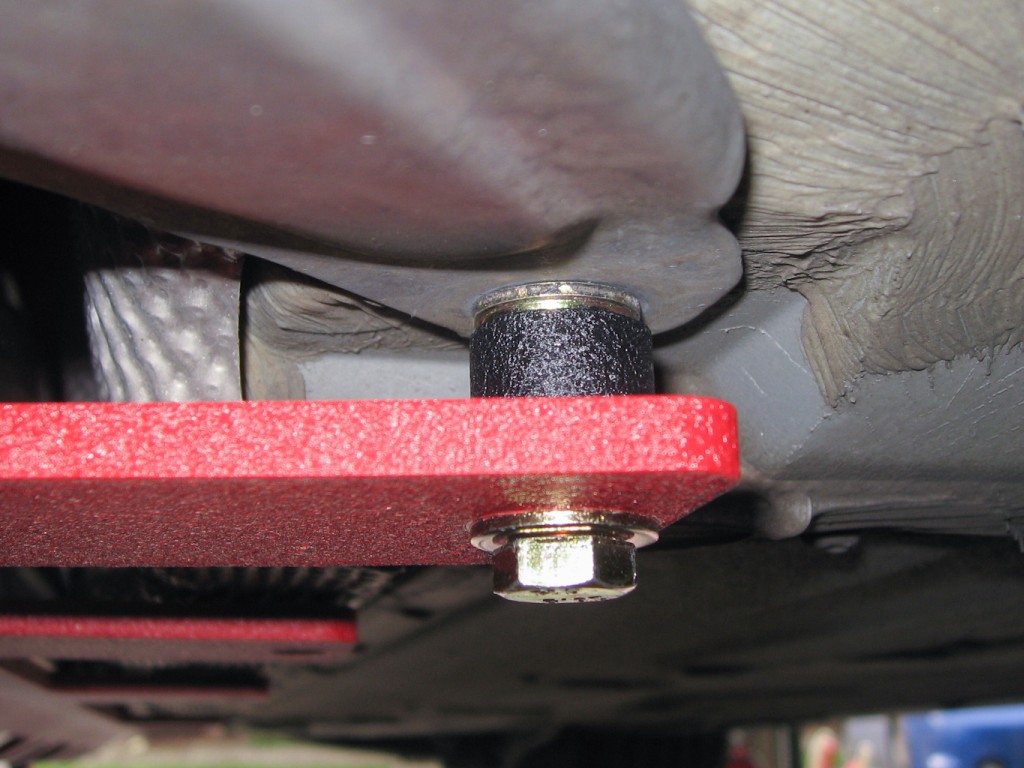
The TTRS specific kit includes additional spacers to help the brace clear the downpipe/cats that isn't required on the TT/TTS. I did not order these spacers since I run the Milltek cat-delete pipes but the brace made contact with the flange on the passenger side pipe. I used some grade 8 washers to space the brace down 1/4" and that worked fine, no rubbing or rattling. If you have the factory mid-cats, or you're running an aftermarket downpipe you'll definitely want to check with Bruce (who has been great to work with through the entire process) prior to ordering to make sure the UB-T will clear.
The part itself is very high quality 6061 aluminum. You can get them powdercoated either red or black and I chose red, because racecar. You can see it's a pretty large too, about 3ft long and 18" at the widest point.


The mod is pretty straightforward but it does require drilling holes in the floor and you'll need to have the car quite high off the ground in order to maneuver everything in place. The brace uses two factory bolt locations and then eight screws are replaced with Rivnuts and bolts. This does require some special tools to install the Rivnuts. We used a 1/2" drill bit to drill the holes and it wasn't quite enough so a 13mm or 17/32 would probably work better. Be careful though because some drill chucks won't accept a bit larger than 1/2". If you're using a 1/2" bit you can simply use a file or dremel to open the holes just a tick. It's also worth buying or renting a high quality Rivnut tool (M8 sized) for the install. You really want those torqued down correctly so that they don't spin which would require drilling the fasteners out.
On to the install, many thanks to Gokart3 for the assistance! Get the car up in the air high enough so that you can work underneath and have enough clearance to operate the drill and Rivnut tool. BE VERY CAREFUL DOING THIS. The mk2 TT is not easy to get up on four jack stands so if you're not comfortable with this take it to a shop, it should only be about an hour to install on a lift. Also, while you can probably do this alone there are a couple of places where it's really very helpful to have a second set of hands (as Gokart3 helped out when I didn't have the nerve to drill into my car ;)
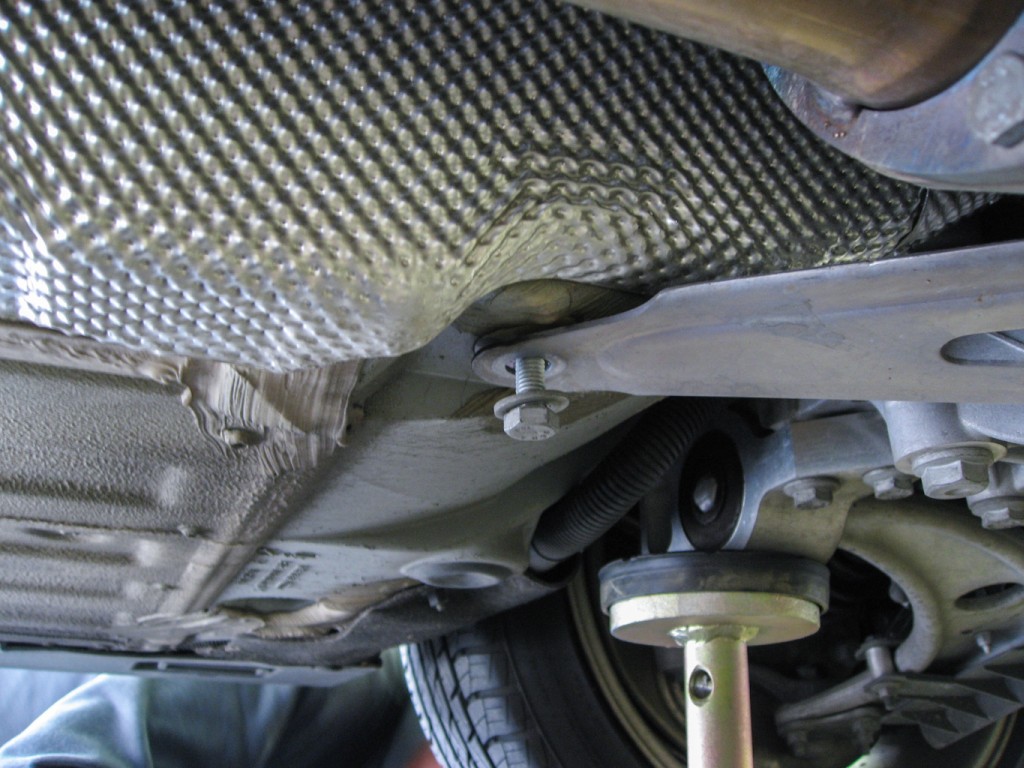
Once the car is safely in the air you can remove the front two bolts that hold the exhaust hanger tabs in place. These are 13mm bolts and should remove easily.
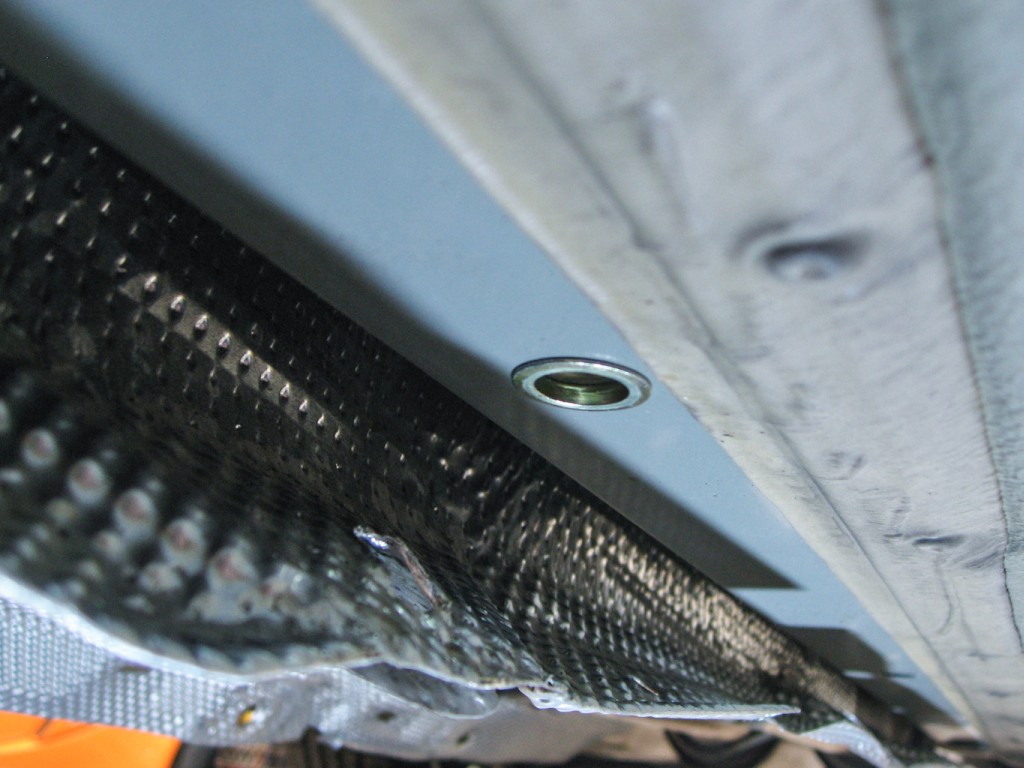
With both of those removed you can get the UB-T in place with the front two bolts (at the front of the car) to see how everything lines up. Here you can see the black powdercoated spacer that comes with the brace along with a few washers to space it low enough to clear the downpipe flange. You can tighten these two bolts until they are snug, careful not to cross-thread, and the brace is stiff enough to hang in place to check the rest of the fitment prior to drilling.
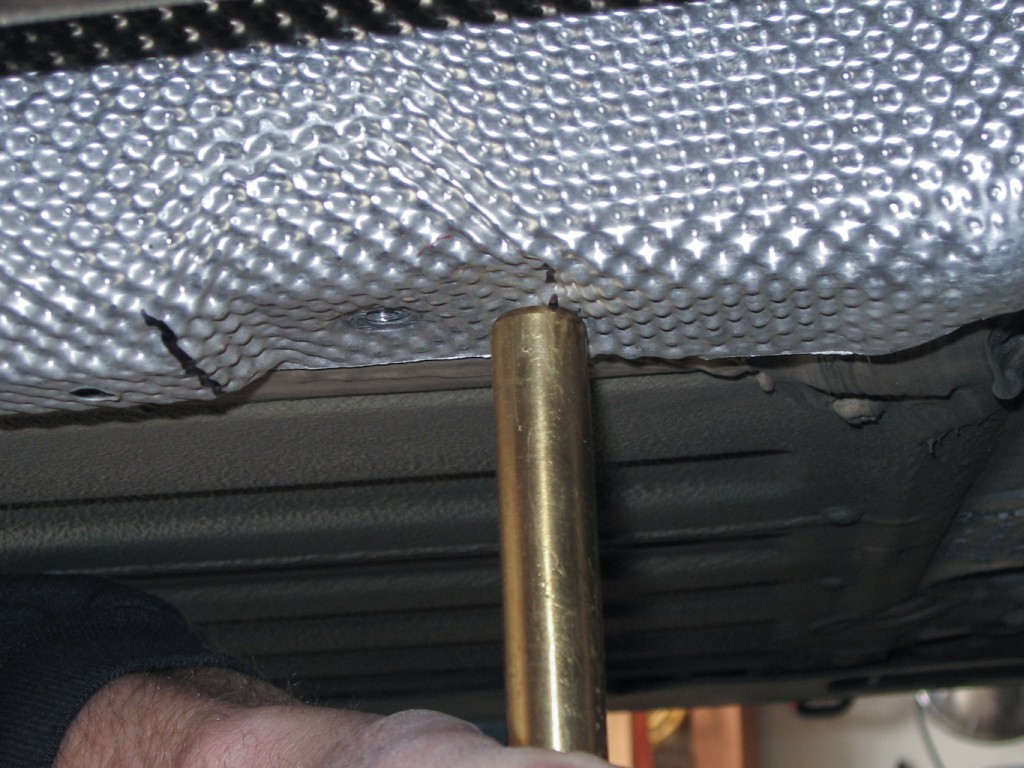
On my car the heat shield was interfering with the fit and I'm sure had I just drilled the holes the shield would have bent into shape but we chose to bend it first. We traced around the places where the shield was in the way and
used a plastic dead-blow hammer and a brass drift to bend the shield back.
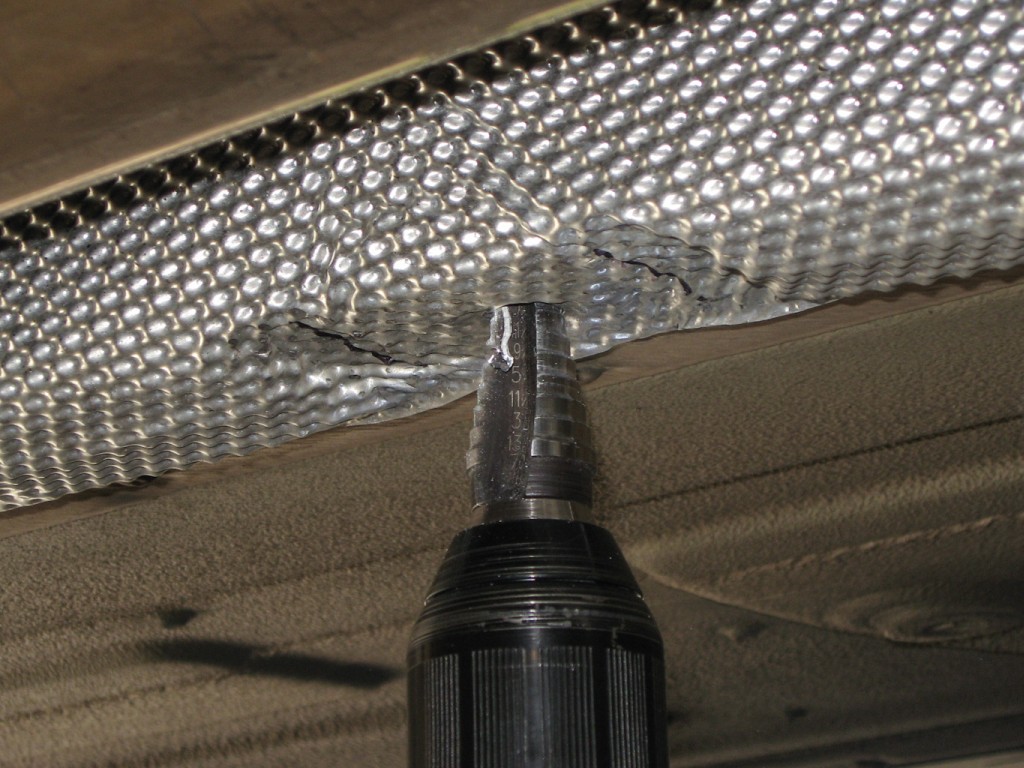
Now the brace should fit flush up against the body and you can check the other 8 holes all line up correctly. For me they were all dead on, but the holes in the brace are slightly oversized to give some range of adjustment as needed. Drop the brace out of the way and remove the eight T30 torx screws. These were very tight on my car, I think they're probably self tapping, so make sure you use a good quality bit to avoid stripping any of the heads. Once they're out you can drill out each hole. You want these to be as close as possible to the size of the Rivnuts so that the Rivnut can get as much bite as possible on the body. We used a stepped bit marked at 1/2" but as I mentioned above a 17/32 would be a better fit and a 13mm might be as well. Since 1/2" wasn't quite enough we used a file to slowly open up each hole, test fitting often, to make sure that we didn't get the holes too oversized. Drilling into your car can be a bit nerve-wracking so consult an expert if you're not comfortable with this.
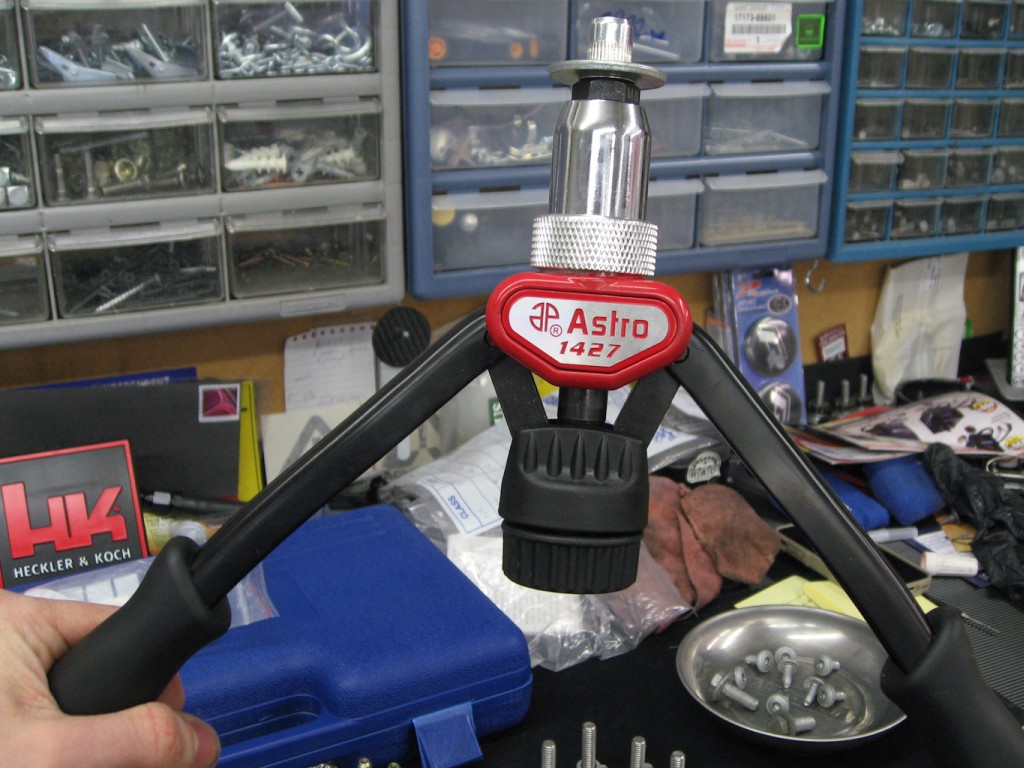
Next it's time to install the Rivnuts. I had never worked with these before but I knew there were some potential issues with not getting them seated correctly or in tight enough where they could spin in place and leave you unable to get the bolt in or out. There are several ways to install these from using the supplied bolts to crush the Rivnut to several other hand tools. I searched around and found several positive reviews for the Astro-Pneumatic 1427 which was available on Amazon Prime (2 day shipping FTW! :) I liked this style tool because it does not put excess stress on the threads and the way the handle is setup allows you to get quite a lot of leverage. We did a test fit of one of the spare Rivnuts (the kit comes with 10 but you only use eight) to see how the tool worked, and also to see what would happen if it was overtightened.
Here's the placement of the Rivnut on the tool with the threads just level with the tool insert. Here I used a washer to simulate the body, the thickness is close to the aluminum unibody.

With the threads at that depth the handles start out angled down a bit which allows you to get a good start with decent leverage.
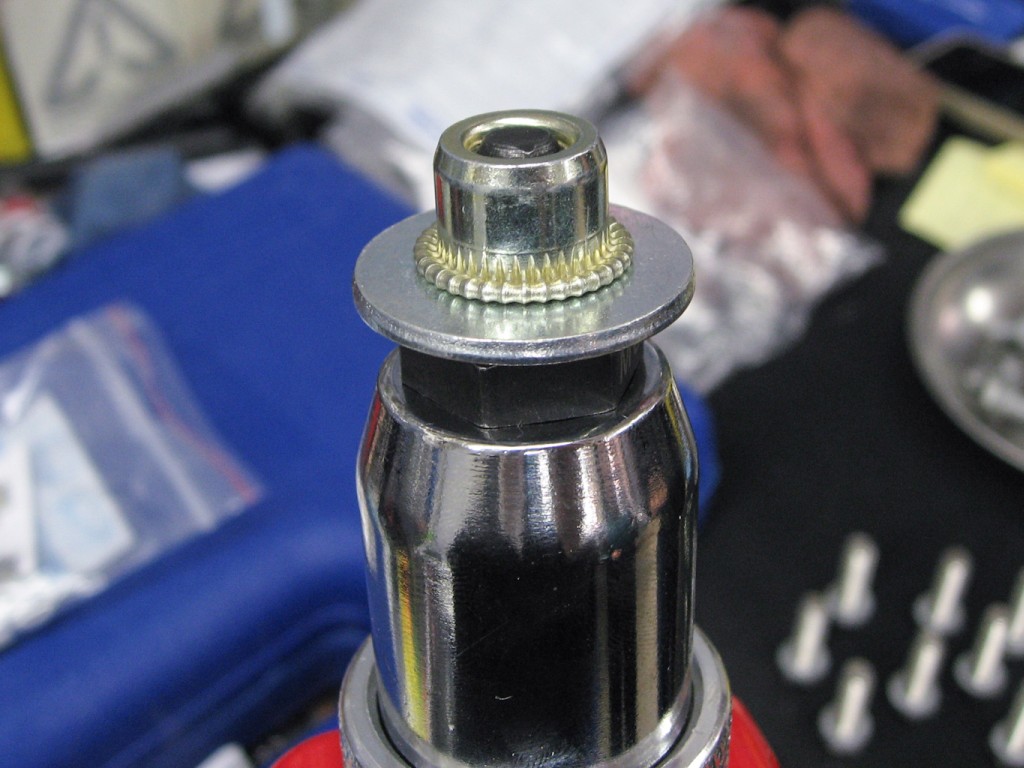
You want to tighten it all the way in the first shot, then back it off a bit and re-tighten to make sure it's clamped all the way. Don't go full gorilla spec on this though as you don't want to pull the threads out of the Rivnut or cause it to crack. You can tell pretty easily when it's tight enough.
And when you're done here's what you're left with, nicely crushed, tight against the washer and the threads unharmed.
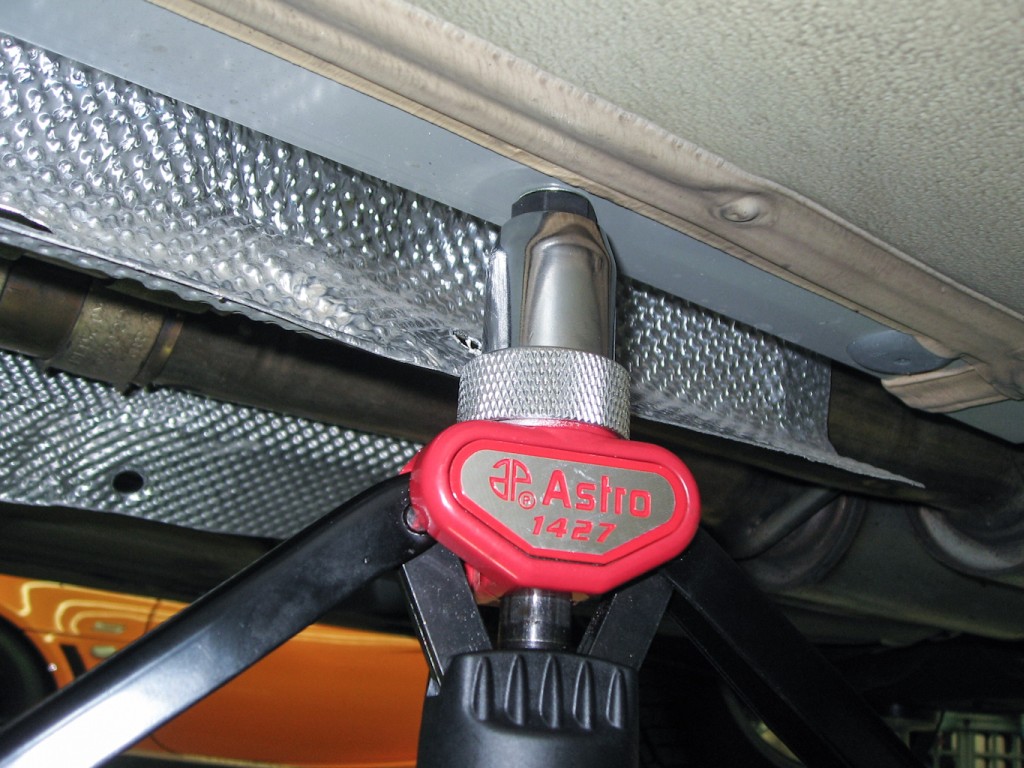
Ok, so that's enough practice. On to the real thing! Get the Rivnut setup on the tool as before and insert into the body. Note that while we drilled through the heat shield for the actual Rivnut install we bent the shield back out of the way and installed straight to the body. This is important for the Rivnut to be fully compressed against the body.
Here's where it helps to have a second set of hands. Have one person press upwards to make sure the Rivnut is inserted all the way up flush with the body, not angled at all, while the second person compresses the handles.
When you're done you get a nicely installed fastener that really looks OEM.
With all eight Rivnuts in place the hard part is done. Simply roll the heatshield back into place and reassemble. Start with the front two again, with the correct spacers and washers correctly located, and get them tight enough to help hold the brace in place but not so tight that you can't maneuver it. Get the rest of the bolts started by hand with the spacers and washers in place. You want to do all of this by hand to make sure nothing cross threads. Also, you'll want to install the bolts with just a bit of medium-strength loctite blue to keep them from vibrating out. Once all 10 bolts are in place you can tighten everything up. I didn't have torque specs but used a fairly short wrench with a 6" long handle to tighten these. Remember you're using stainless steel bolts into the Rivnuts and you really don't want to tear any threads out so don't overdo it. These aren't load bearing, you just don't want them to back out.
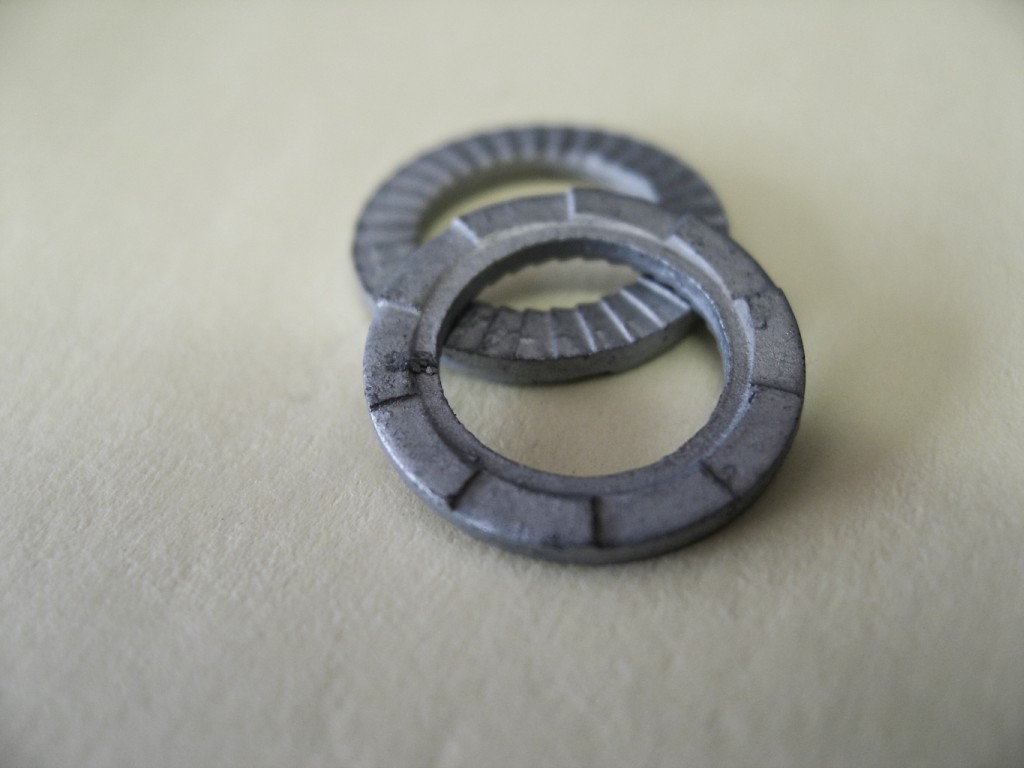
I went with a little extra insurance and used Nordlock washers but that's probably overkill. These use a cam system (shown face up in the foreground) that makes it impossible for the bolt to come loose. You can google for the details, they're very cool but spendy.
I was a little concerned about clearance all around but you can see that its actually pretty good. The extra 1/4" shim gets just enough clearance at the flange without the secondary cats in place.

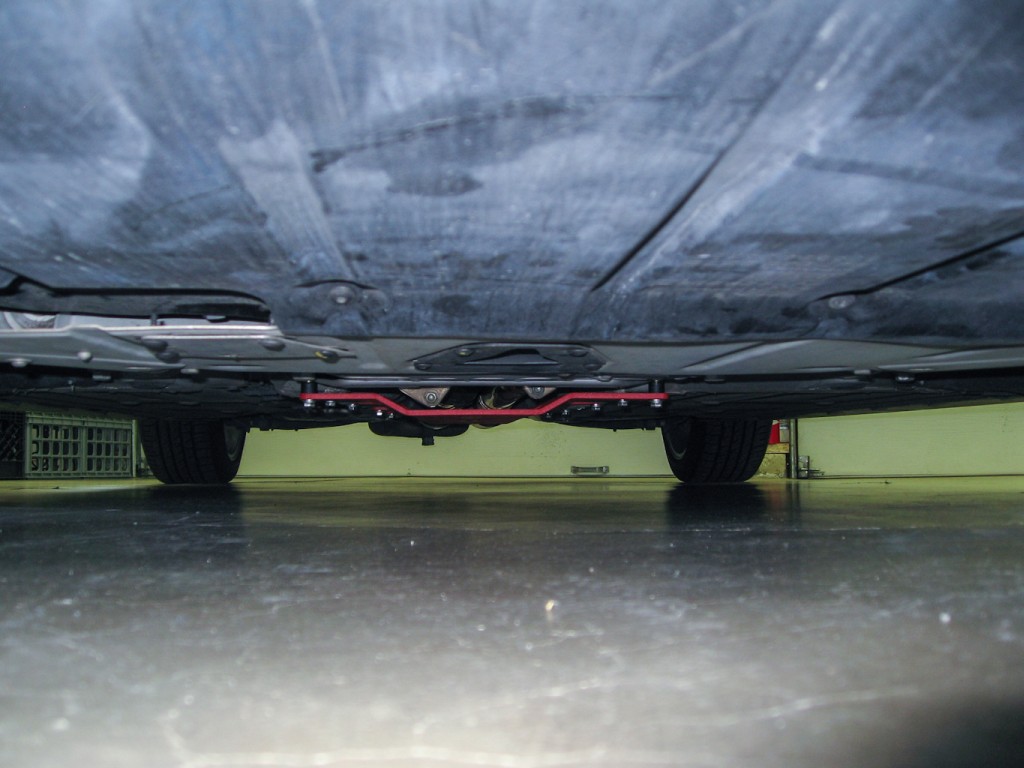
I've also got some pictures with the car on the ground. From straight level across the bottom of the car it hangs about 1.25" lower than the body. When viewed from the front it doesn't really seem too low. There are a couple of steep driveways that I need to see how close it gets but the stock ride height on the TTRS really gives a ton of clearance so I'm not too worried. If you've got H&R springs that might be a bit tight since they lower over an inch.