Getting the grill out is the hard part. There are two uber-tabs that fought us quite a bit but we eventually managed to pry them out without having to resort to violence. The new grill just pops back in place without any issues.
Start by getting the front of the car in the air and on stands. It doesn't need to be very high but you will need the front wheels off so ramps won't cut it.
To remove the bumper you'll need to remove 4 screws along the top of the grill, 7 screws at the bottom of the bumper and then 4 nuts, 2 on each side, inside the fender liner.
Once the wheels are off remove the screws that hold the fender liner in place. You'll also need to remove the aero-flaps at the front of the wheel.
There are several screws holding the aero-flap in place, one is underneath.
And four shorter screws holding the fender liner, one is just out of view in this pic right at the fender edge.
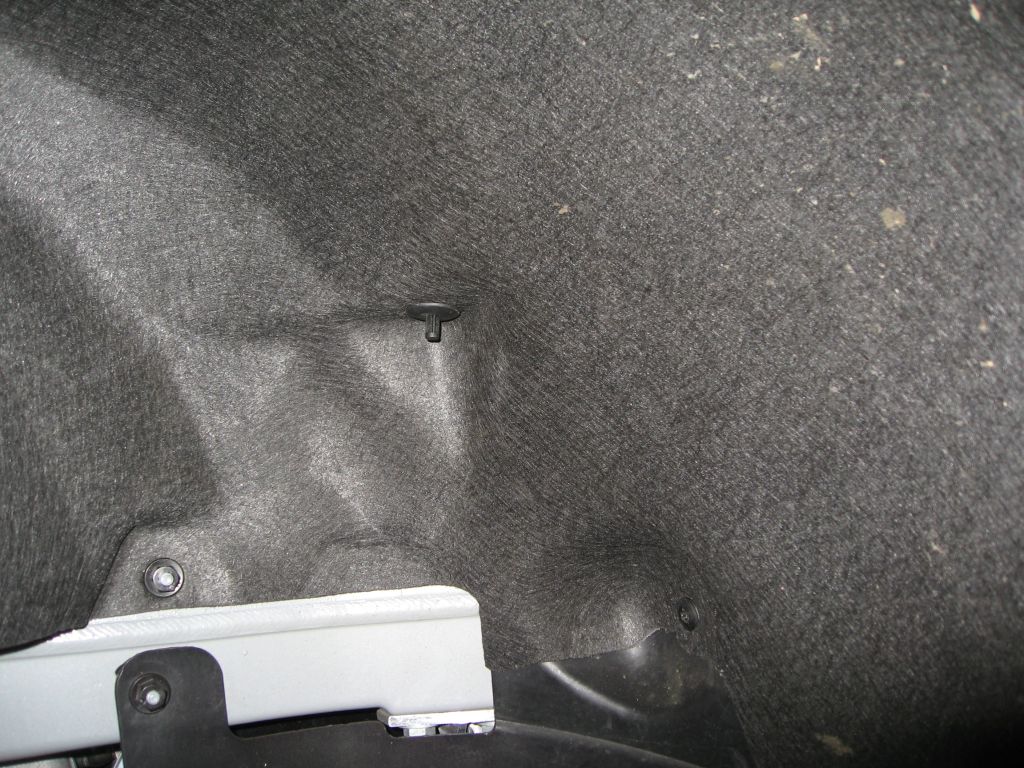
And finally there's one plastic rivet that needs to come out. If you had a mk1 these are just like the widgets that hold the front engine bay covers on. Just push the center lightly until it clicks in and then you'll be able to pry it out.
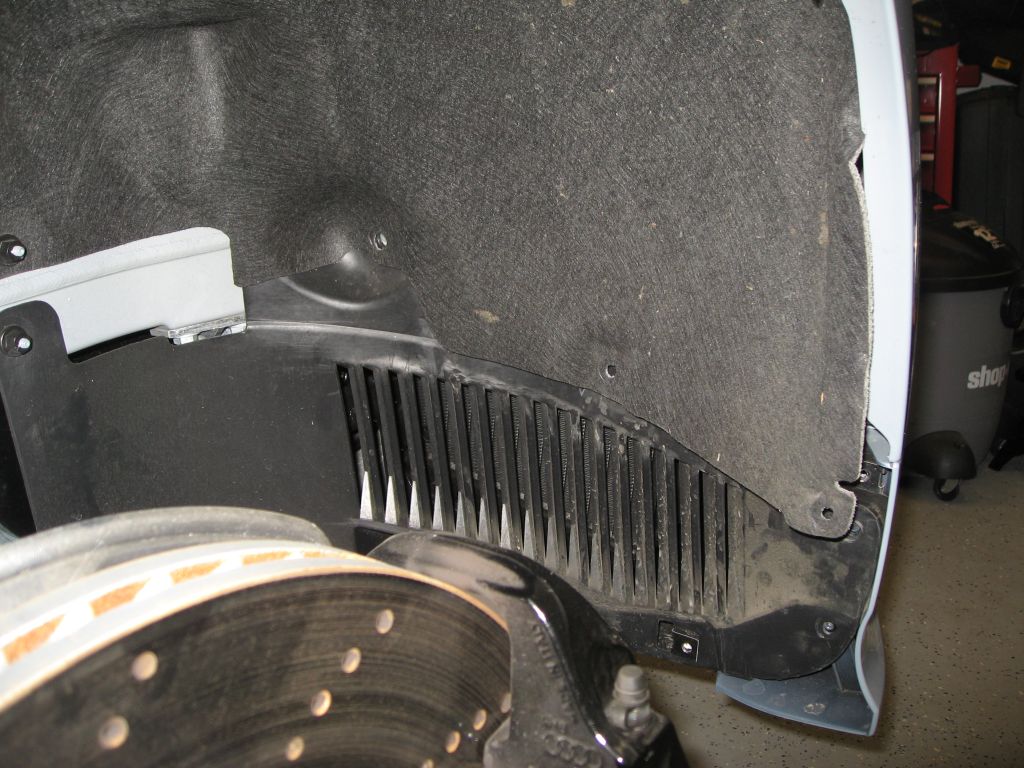
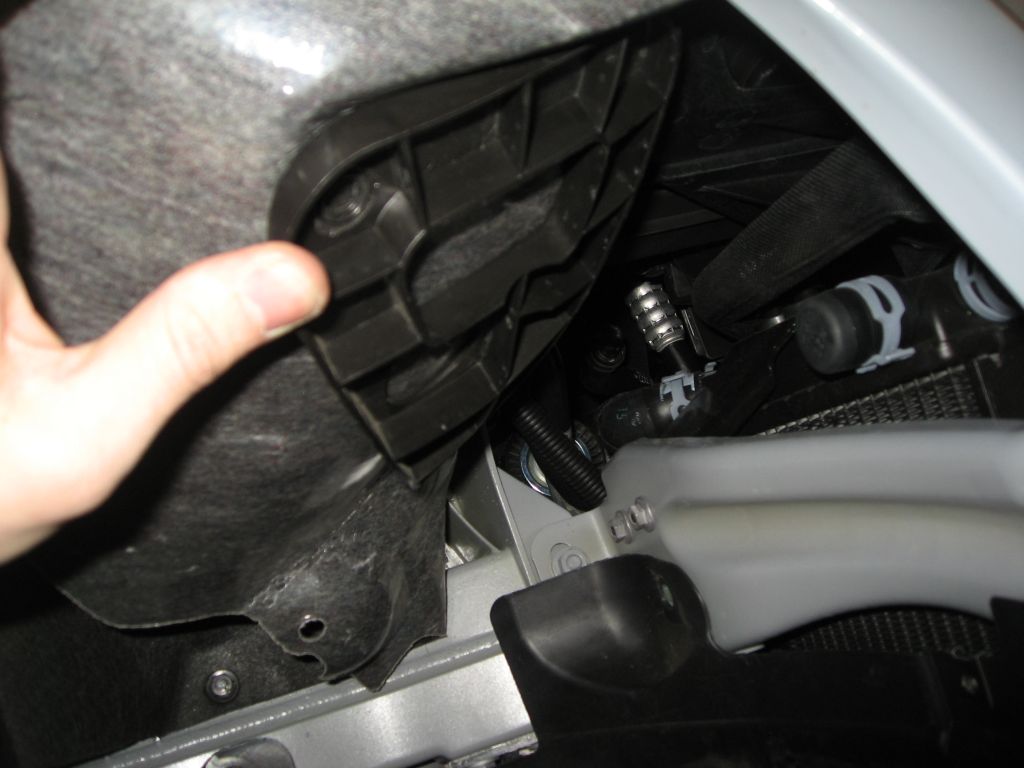
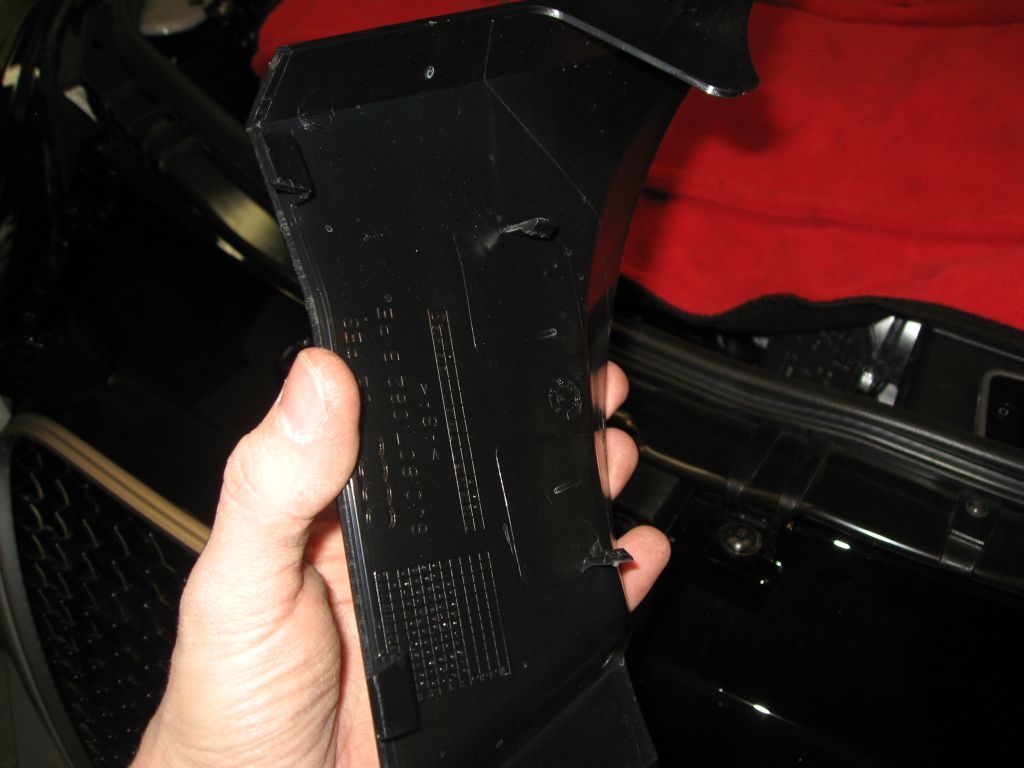
Now you can pry the fender liner back a bit to expose the four nuts that need to be removed. Be careful when folding the liner back as there is a plastic frame on the inside which you can see here.
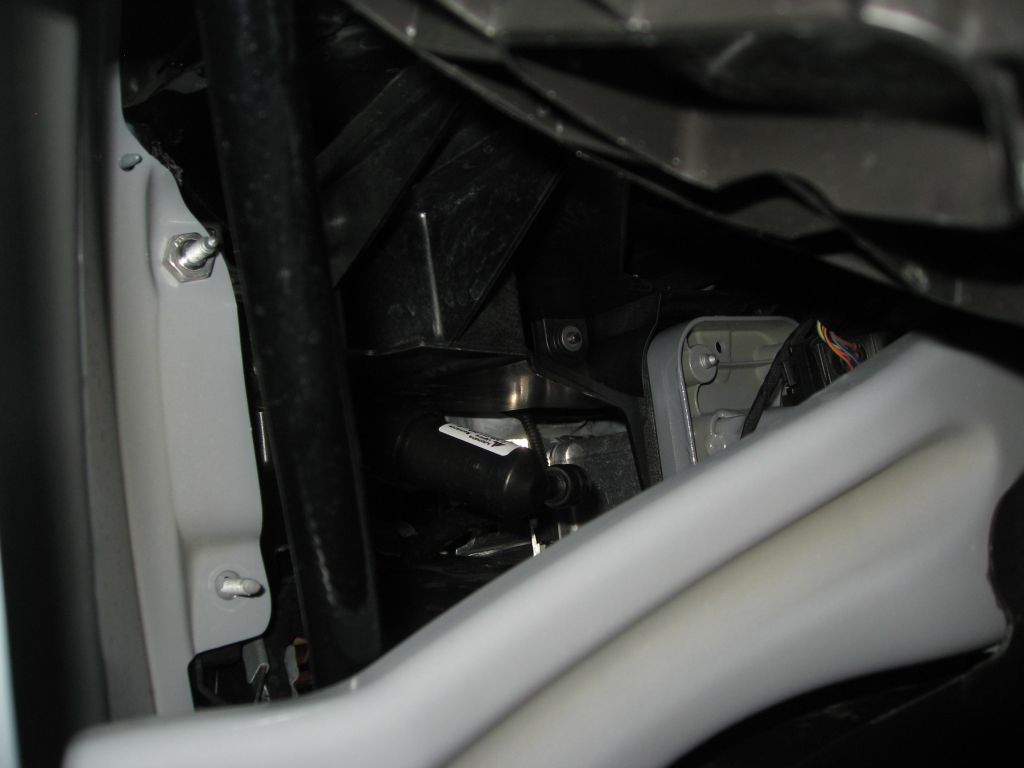
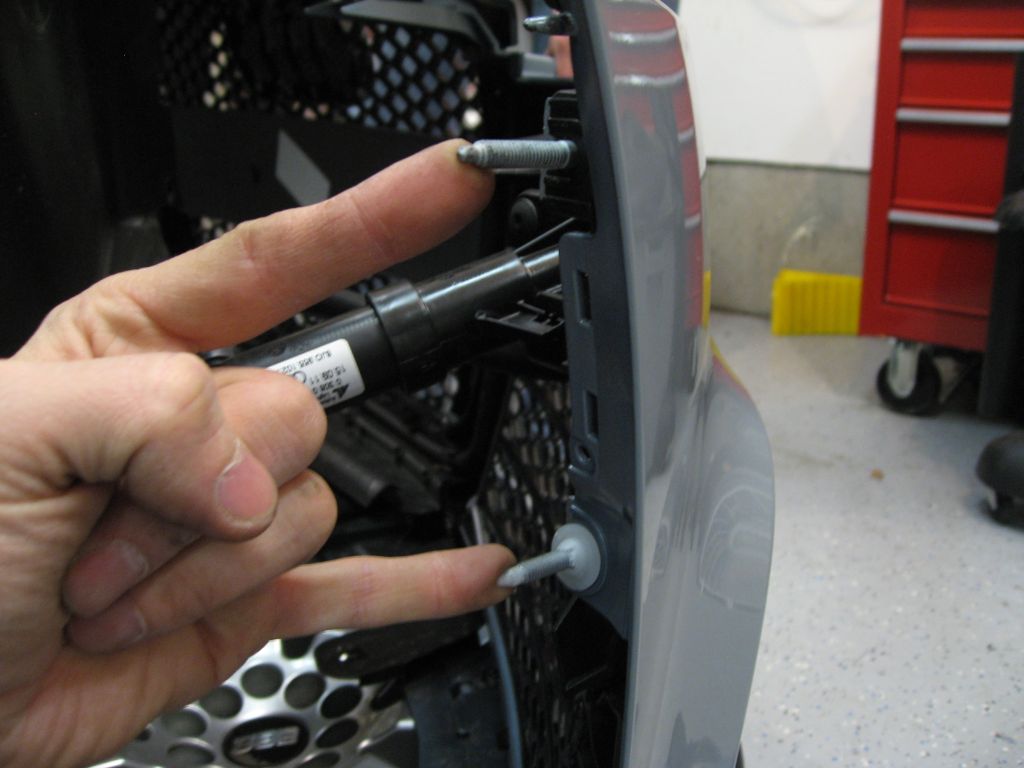
After all of that you'll see the nuts on the long studs which hold the bumper to the fender. The two on the driver side are easy to get to.
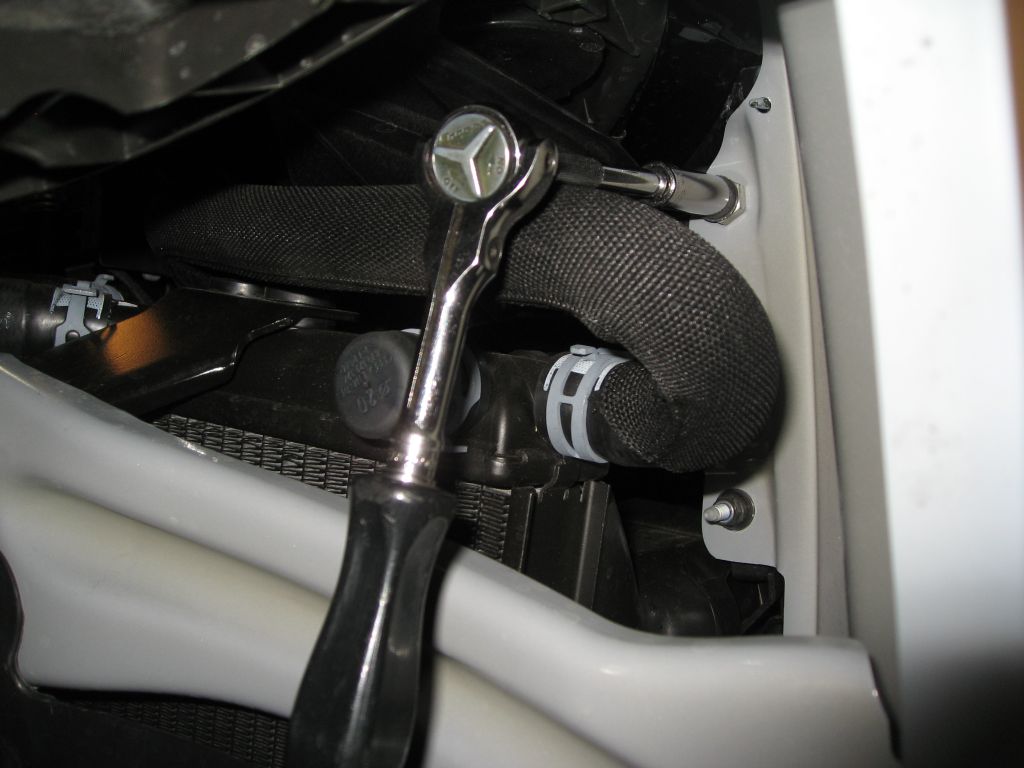
On the passenger side you need to work around the coolant line going to the aux radiator.
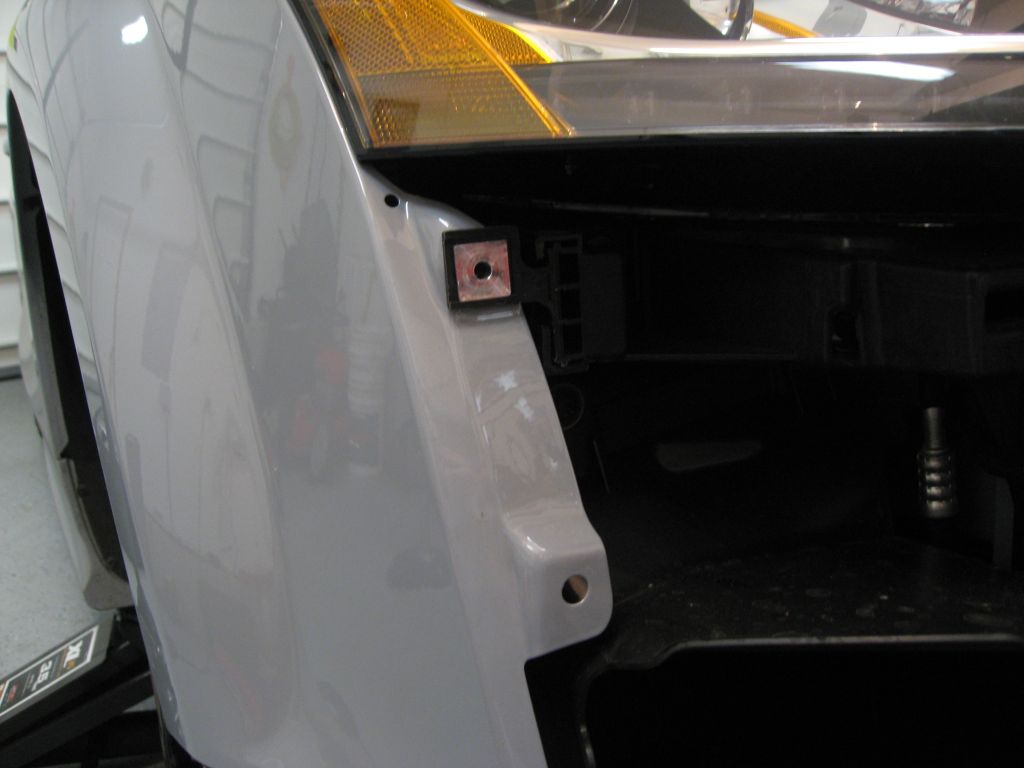
When reassembling these two studs will go back through the mounting points in the fenders. Be careful not to scratch the paint or the headlights when lining them up.
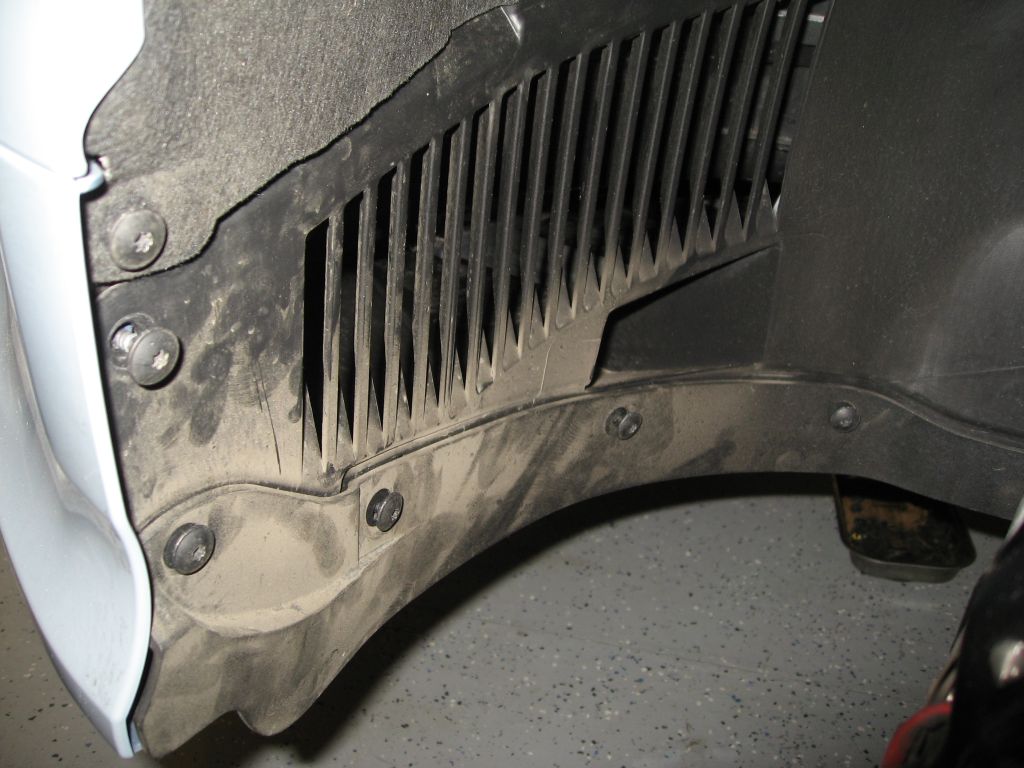
From under the car remove the 5 torx screws at the front of the belly tray. You don't need to take the tray out, just these screws. There are also two additional torx in the splitter that need to be removed. You can see one in the pic and the other is of course on the other side.
Now back up top there are four remaining torx screws to be removed. Two of them are visible on top of the grill by the hood latch and two are under the black plastic trim pieces between the grill and headlights.
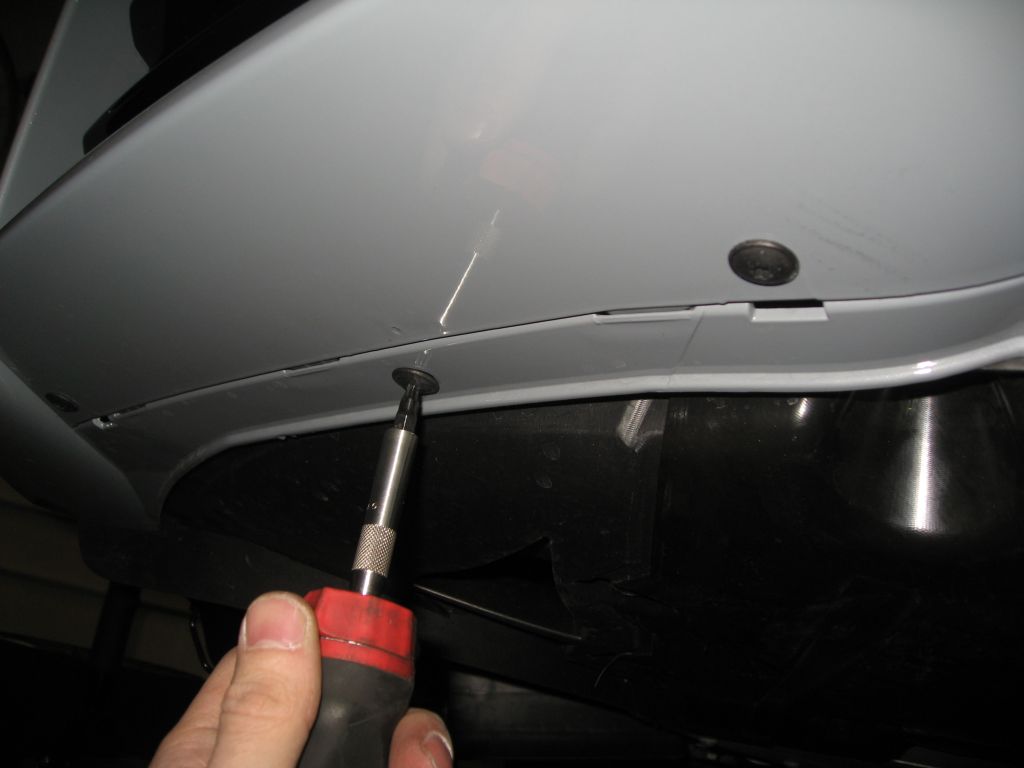
The two plastic trim pieces are held in place with three tabs. The top one is easy to remove and while shown here with a screwdriver you can easily pop them out with just your fingernail.
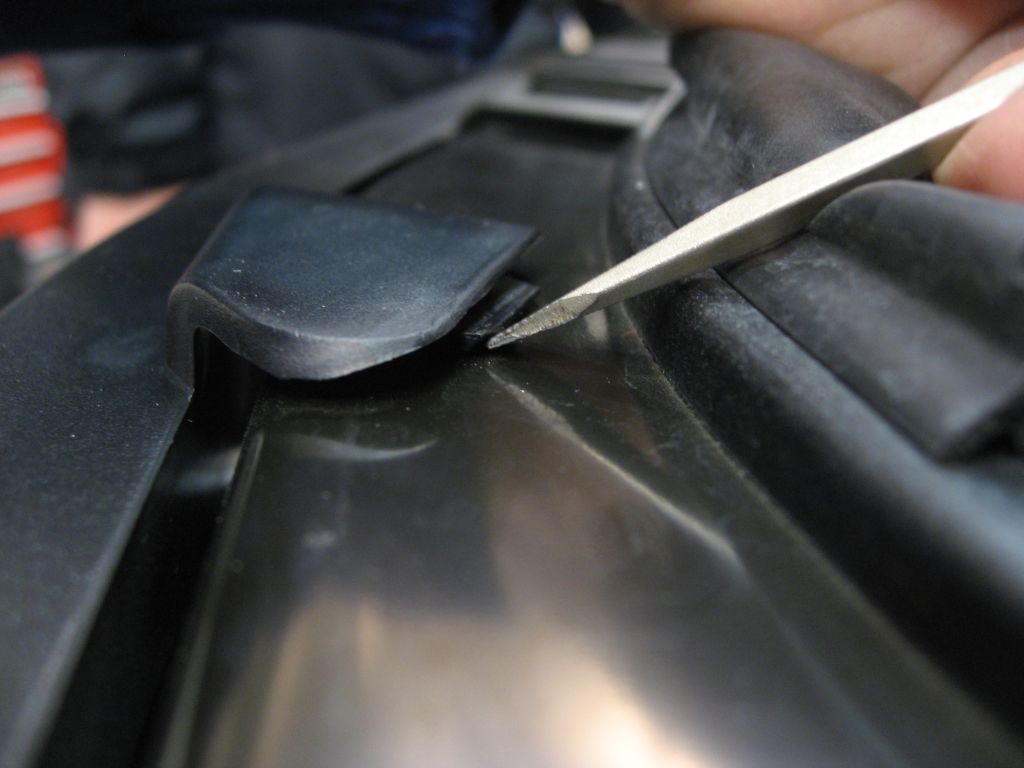
Things get a little more interesting here as the next two tabs can fight a bit. The manual says to pry from between the headlight lens and the trim piece by lifting it out with your hand, careful not to damage the headlight! We were able to pop the top one out pretty easily this way and then used a screwdriver to release the lower tab by pushing down on it. Here's a pic of where the tabs are and how they're oriented and how to apply pressure with the screwdriver to release the bottom one.
Once those screws are out the bumper is ready to be removed. It helps to have two people to pull straight out on each side to get the studs to clear the holes in the fenders. Be careful you don't go too far with it because the headlight washer hose is still attached. We didn't mess with that at all because we were able to swing the bumper far enough away from the car to get the grill out.
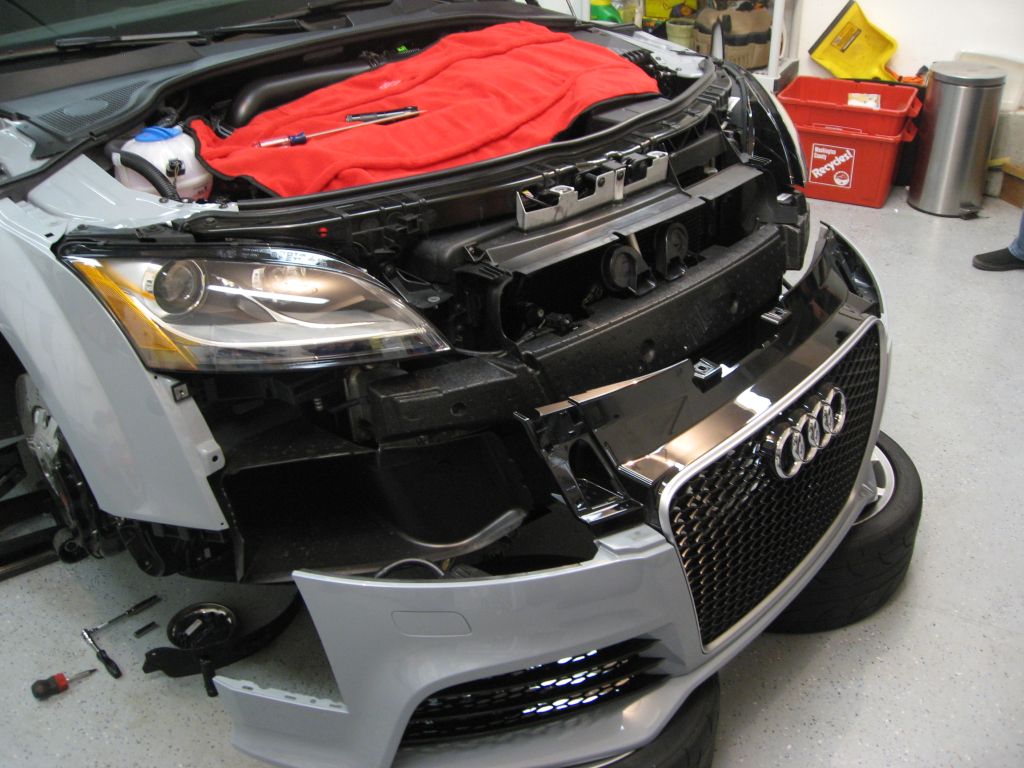
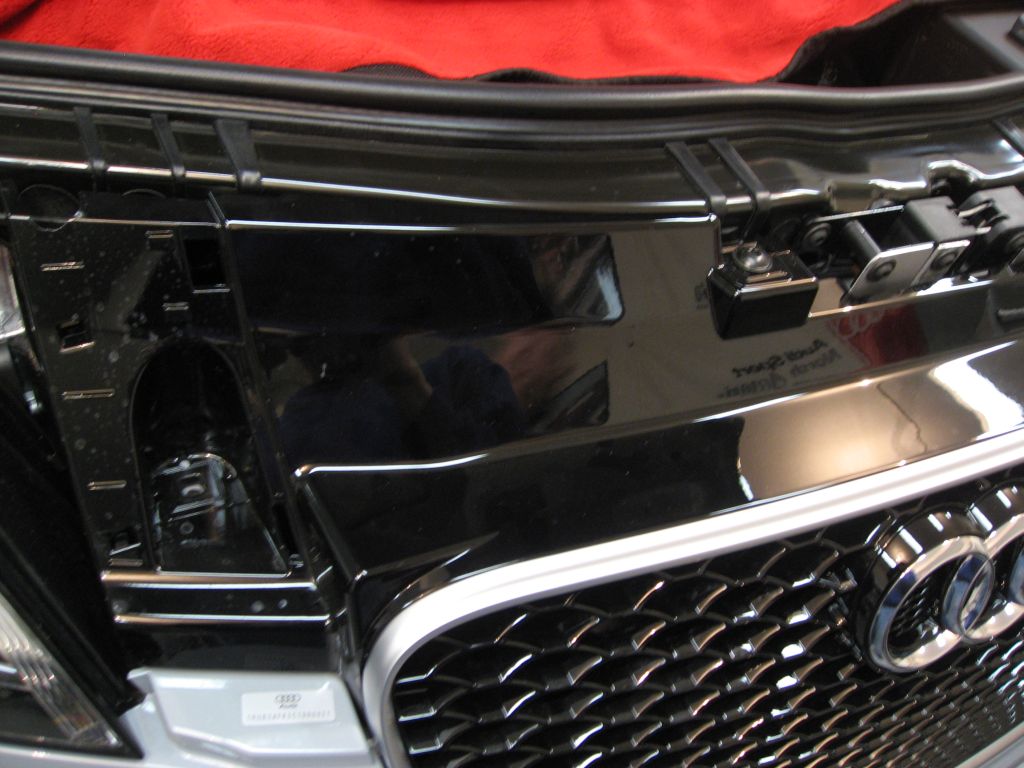
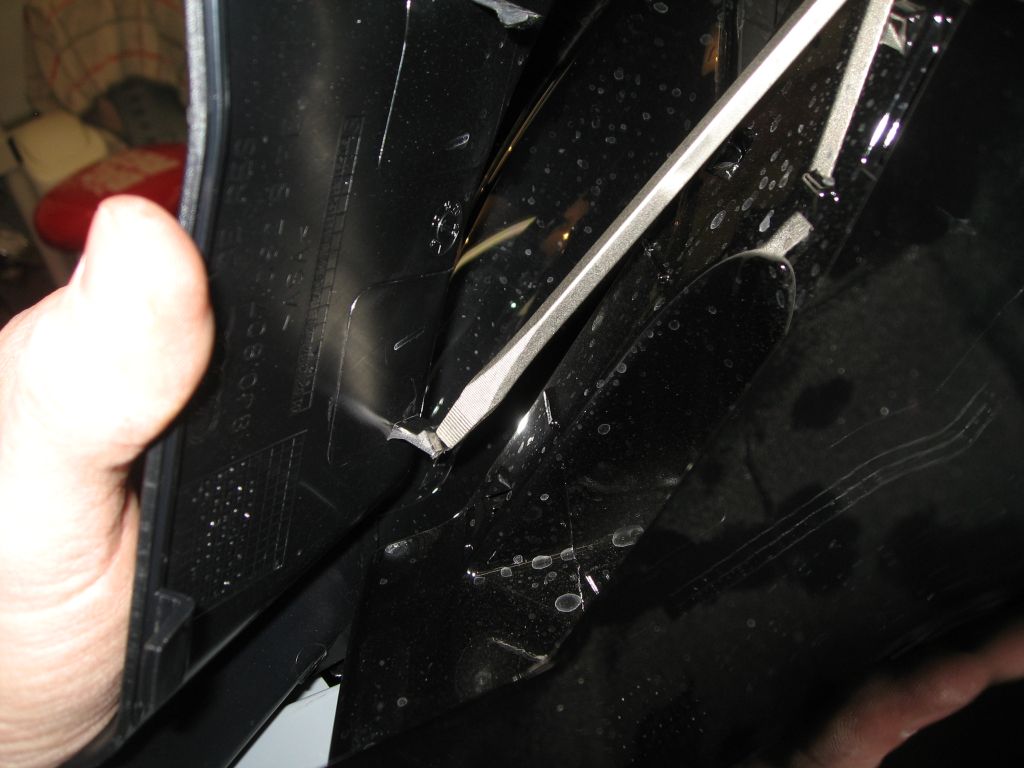
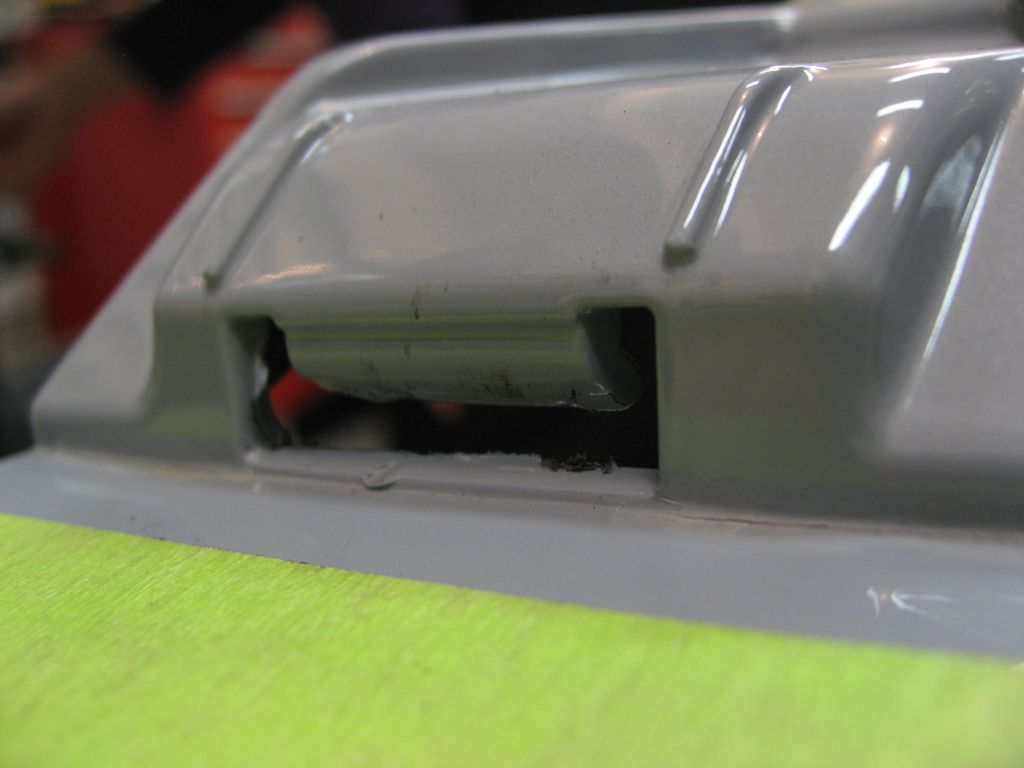
Getting the grill out is easy except for the two main tabs on either side. First remove all of the torx screws from the back side. Then start releasing the smaller tabs along the bottom and lower sides. Finally you should be able to release the larger tabs towards the middle on the side. That will leave you with just the two large horizontal tabs that are under the locating pins. These will require quite a bit force pushing up from the bottom (on the back side of the grill) to get them up over the bumper while simultaneous pushing up on the retaining tabs that try to hold the clips down. Here's a pic of one of the slots. We taped off the bumper and used some plastic interior trim tools to help pry the tab up over the bumper lip. It's doable, you just need to use some persuasion :)
And that should be it, the grill should release at that point. To install the new grill just get it lined up on the locating pics and secure the rest of the tabs and replace the torx screws.
When installing the bumper just line everything up on the two studs going to each fender and the rest should slide in place. We tightened those first, and then the lower 7 screws and then finally the top four and the panel gaps all looked pretty good. Finally replace the fender liner and aero-flaps with the remaining fasteners. The plastic rivet should pop into place and then push the center back in flush to secure it. The plastic headlight trim pieces are pretty self explanatory and the tabs should all secure with light pressure.
Torque the wheels and get the car back on the ground and you should be all done!