The installation instructions supplied by Haldex are pretty good, this isn't a very complicated install. However, there were a few tricks I noted as I ended up installing my controller many times (long story) so I thought I would document them here.
Also, when ordering be sure you order the correct controller for your car. Gen 2 Haldex is physically different from Gen 4 so a Gen 2 controller can not be installed in a Gen 4 coupling.
Within the Gen 4 family however there are several varieties that are all physically the same but different applications. For a TTRS the Haldex coupling is a 0BY unit and you can order a race or competition controller. TTS, GolfR, Tiguan, Passat, etc all are different coupling variants (0BR, 0AY, etc).
The usual disclaimers apply... This should only be an hour install at a shop (really more like 15 minutes) so if you're unsure of what your'e doing take it to someone.
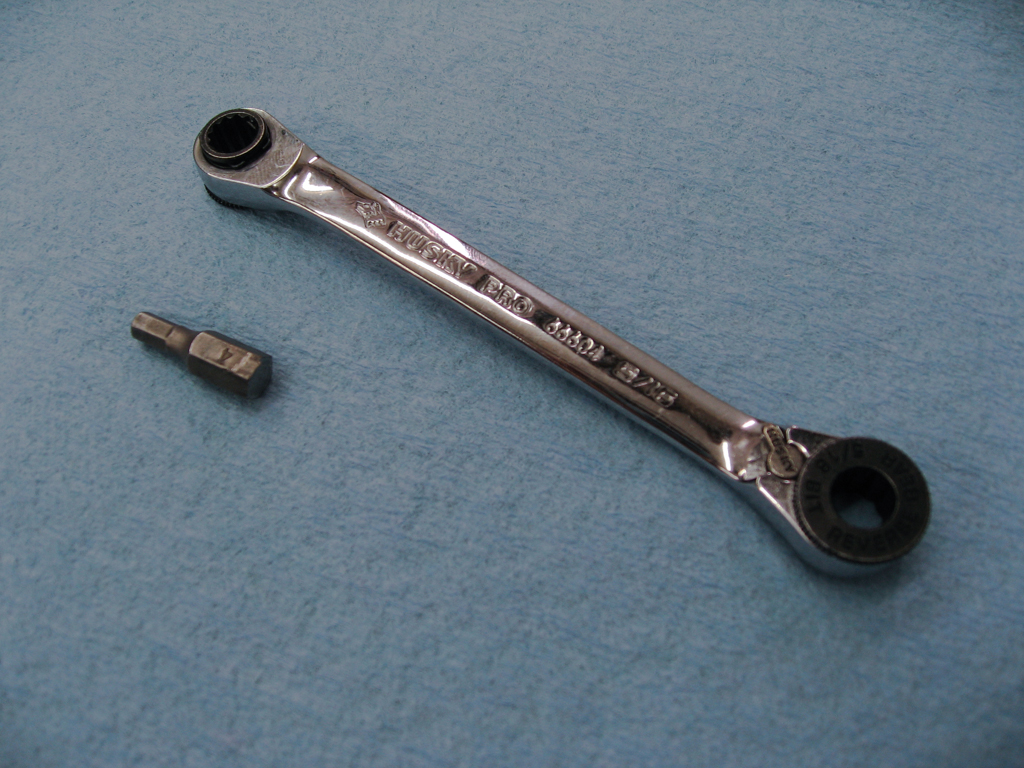
You don't really need any specialty tools for this installation but there is one that can make life much easier. The top allen bolt is in a tight spot with the fuel tank heat shield just a couple inches away. There's not enough clearance for a 1/4" driver socket on a wrench so one of these small drivers with a 4mm allen bit is perfect.
Tools:
4mm allen - 2 bolts securing the controller
5mm allen - Haldex fill plug in case you need to top it off
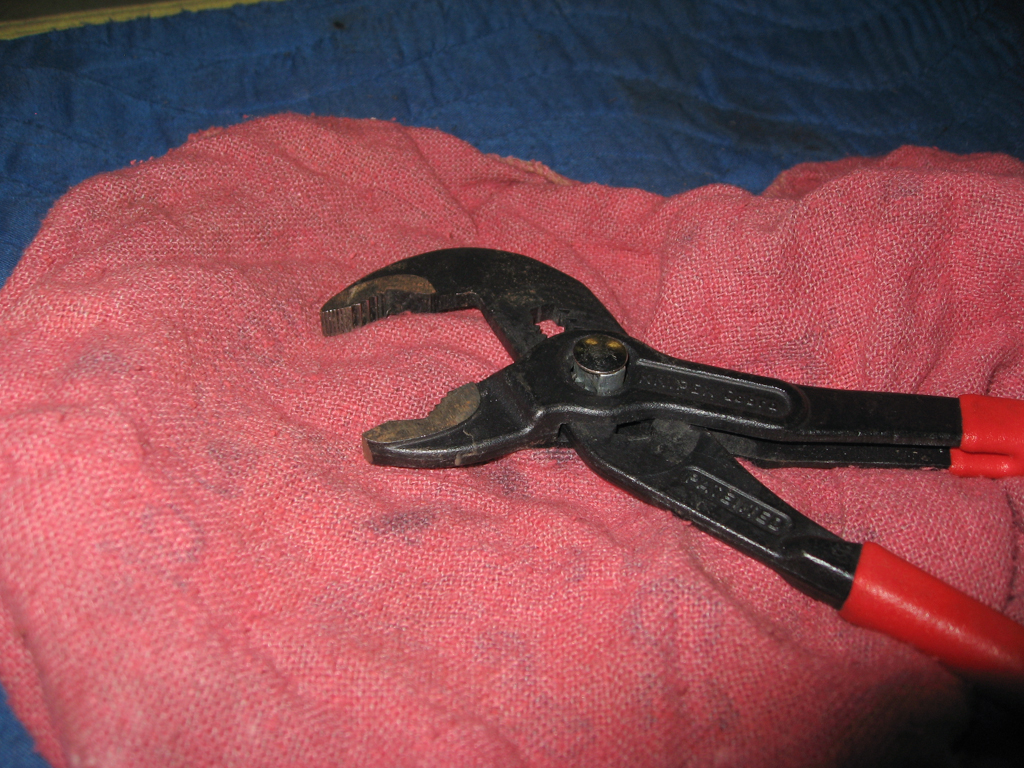
channel locks - Might be required if the throttle valve needs some assistance coming out
drain pan - You'll lose a small amount of fluid during the swap
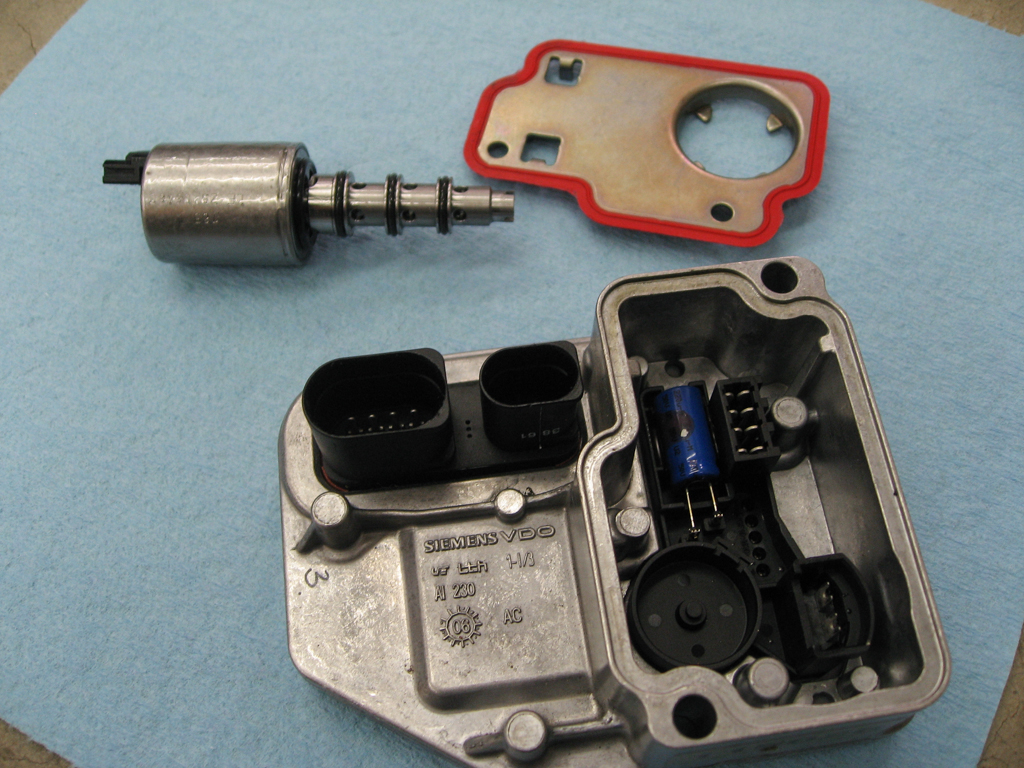
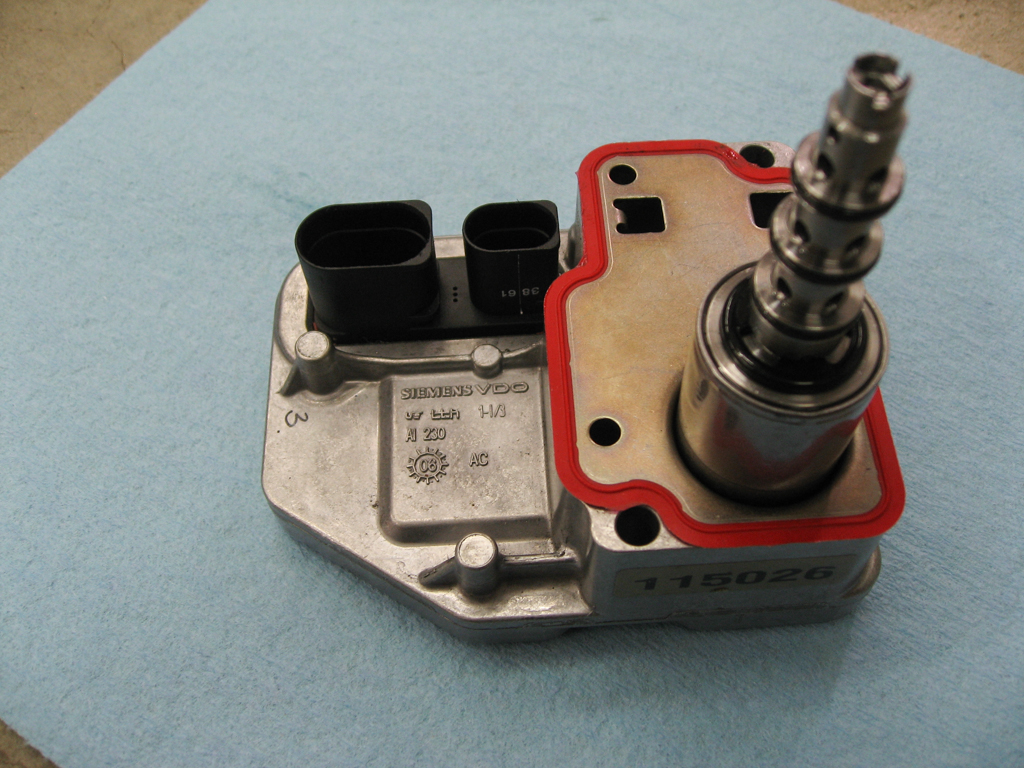
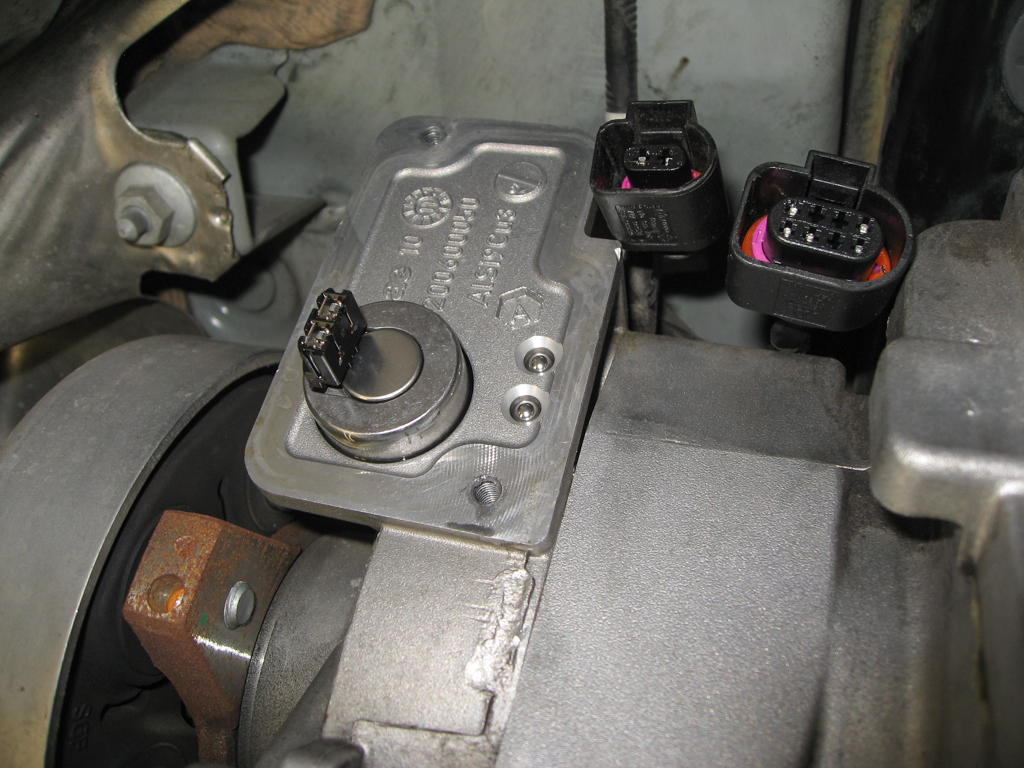
Here's the main controller unit, the throttle valve and the sealing plate as supplied by Haldex. The stocker controller is all exactly the same as this physically. The second picture shows how everything looks assembled once installed.
Also, since the parts are identical to the stock controller you may wish to mark the throttle valve with a sharpie so you don't mix them up. I marked mine on the end of the barrel next to the black electrical connector.
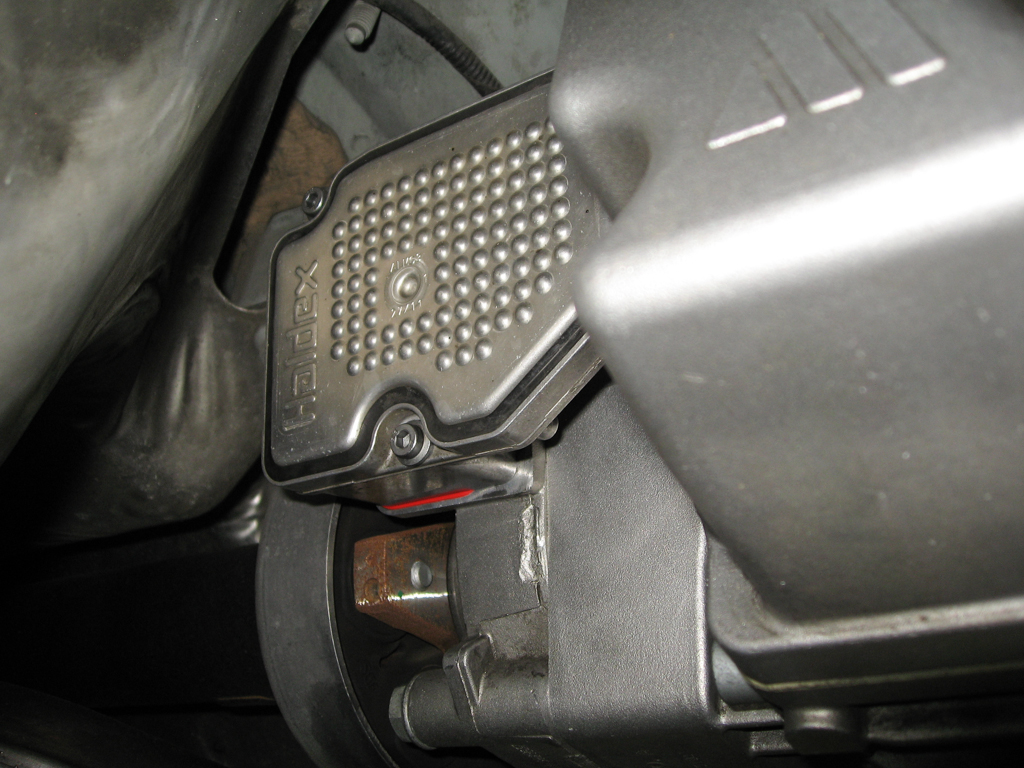
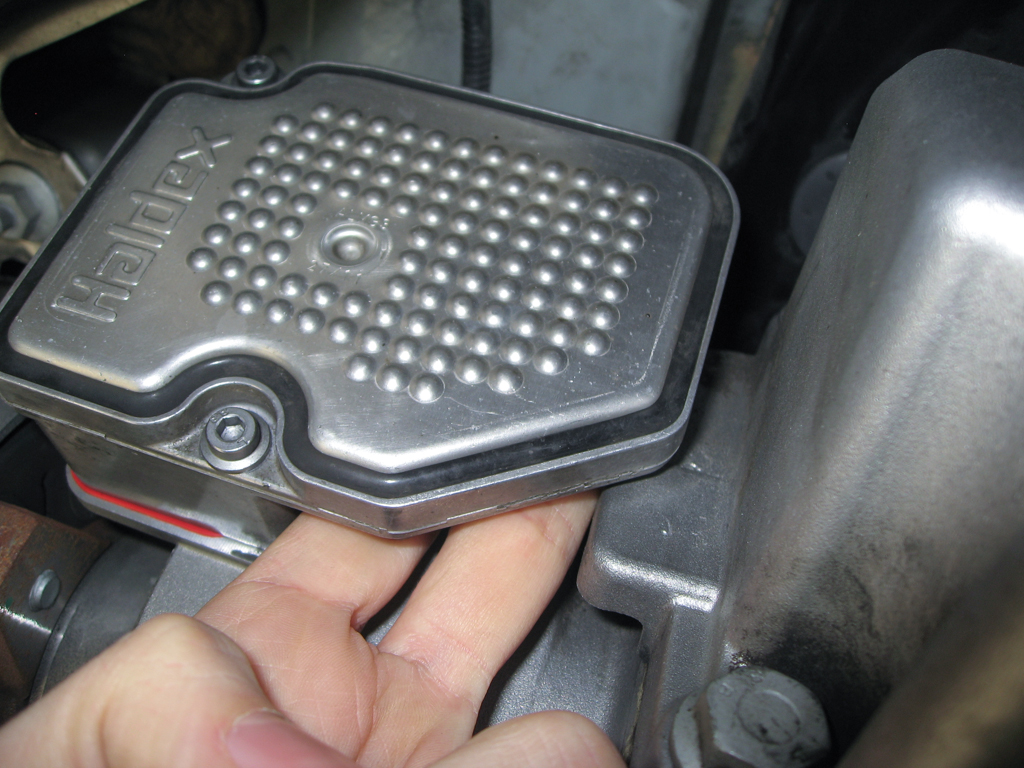
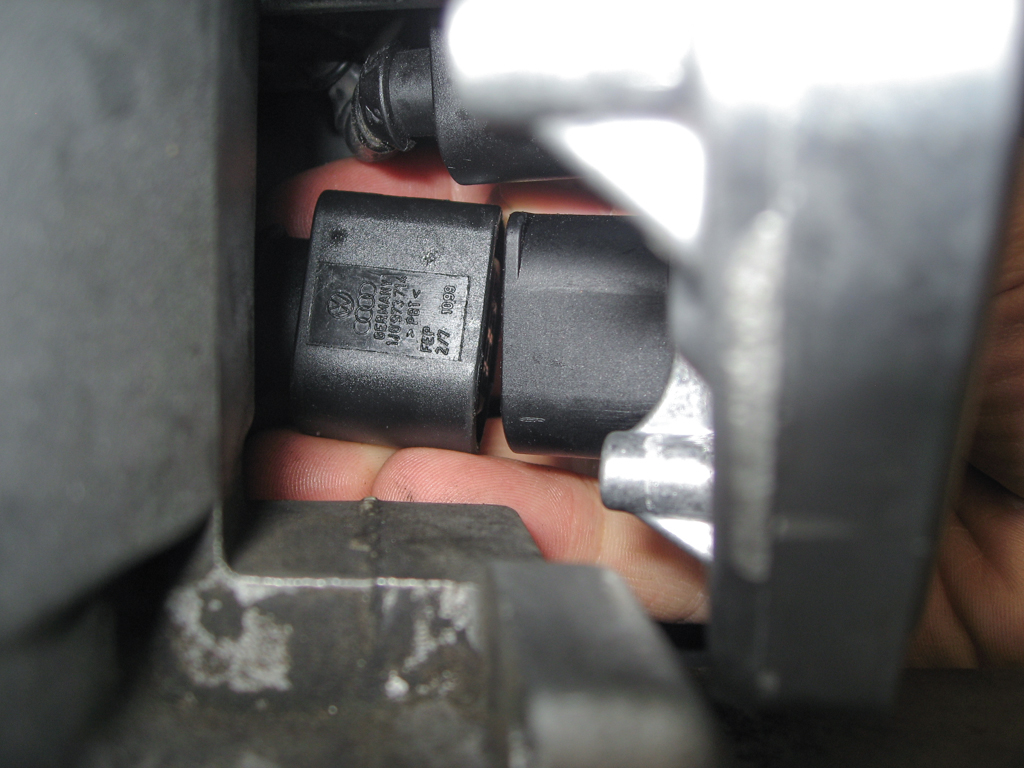
First find the location of the stock controller :) This is ahead of the rear axle and on the driver side of the car (for LHD cars anyway). You can see the main driveshaft coming in to the coupling in the lower left of the frame.
Make sure to bring the throttle valve, controller and drain pan before you get started.
You can just see the red seal peeking out of the bottom of the unit. You'll want to clean around this area a bit before starting so you don't get any dirt/grit/grease into the sealing surface during the swap.
First step will be to release the electrical connectors at the top of the controller. I had the camera up against the bottom of the car to get this picture... you can't get your head up there so you're working a little blind on this but it's not as bad as it seems. The smaller connector on the left does not have enough slack to come down with the controller but the larger connector on the right does. So if you can't get that one disconnected for whatever reason you can wait.
You'll note these are standard VAG electrical connectors which have a small tab that must be pushed down/back to release the internal clip. Here's where the first trick comes in.
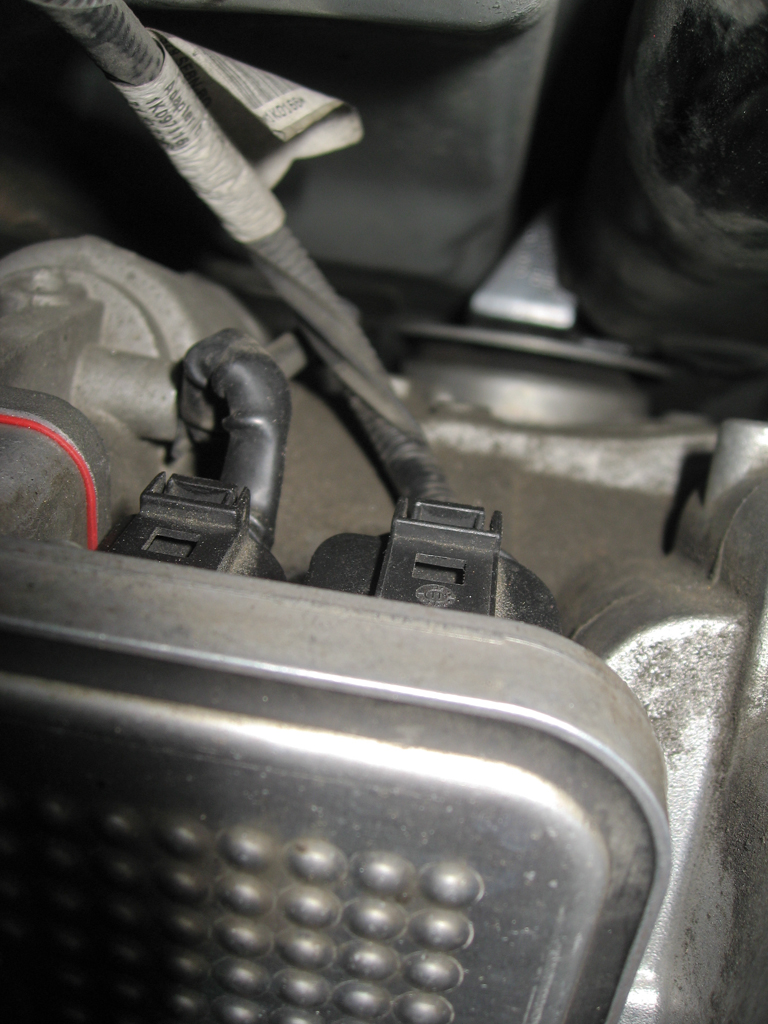
If you get directly under the controller you'll note that there's a gap between the controller and the coupling itself and you can see the bottom of the two electrical connectors.
Reach up through the gap and push the connectors forward, as if plugging them in. While holding them that way reach over the top with your other hand and release the clips, you should hear a faint click. If you just reach over the top and push back on the release lever you're also effectively trying to push the plug off at the same time. That puts additional tension on the catch which makes it harder to release.
By holding the plug still while releasing the clip you take that pressure off.
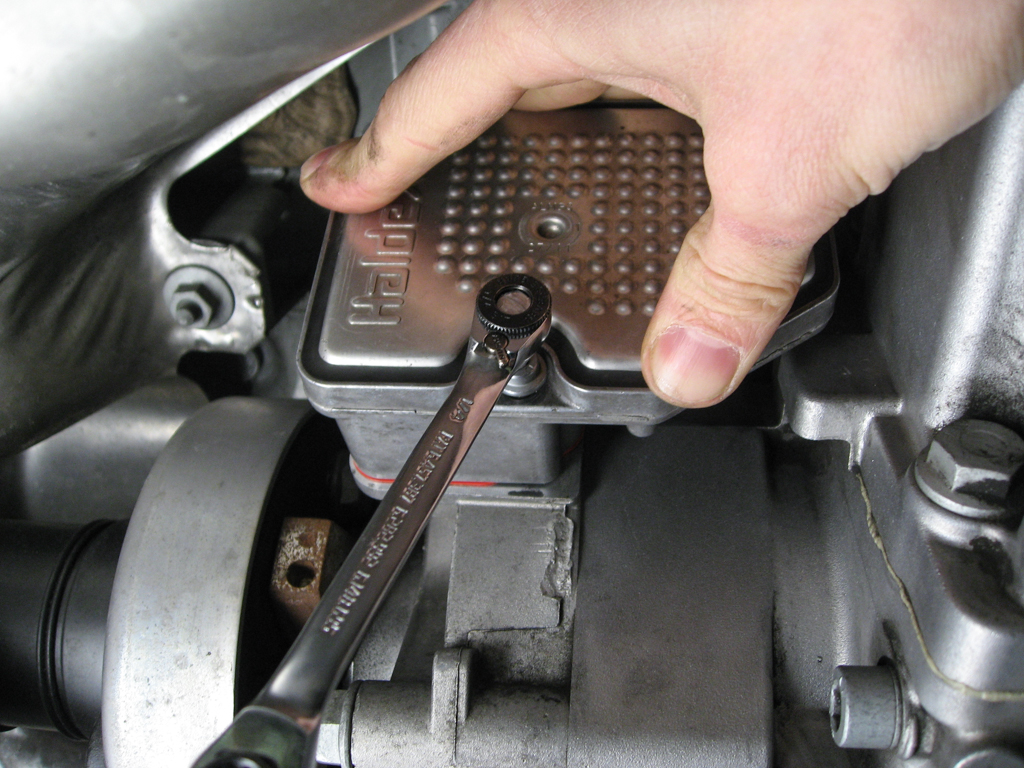
Once the two plugs are disconnected it's time to undo the two bolts holding the controller in place. Remove the top bolt first while leaving the lower bolt tight.
You did remember to bring the new throttle valve with you right? If not get that now :) Also get your drain pan in place under the controller in case there are any leaks as the controller is removed.
With the top bolt out, use one hand to hold the controller firmly in place while removing the lower bolt.
There are two reasons to hold the controller in place like this. As noted in the picture above the throttle valve is plugged in to the controller with a fairly small electrical connector so you don't want the weight of the controller hanging off of that connector.
The second reason is that the Haldex unit may still be under pressure which will cause that throttle valve to pop out as soon as the controller is no longer holding it in place. So hold the controller tight, get the bolt out, and then remove the controller and make sure the throttle valve stays in place.
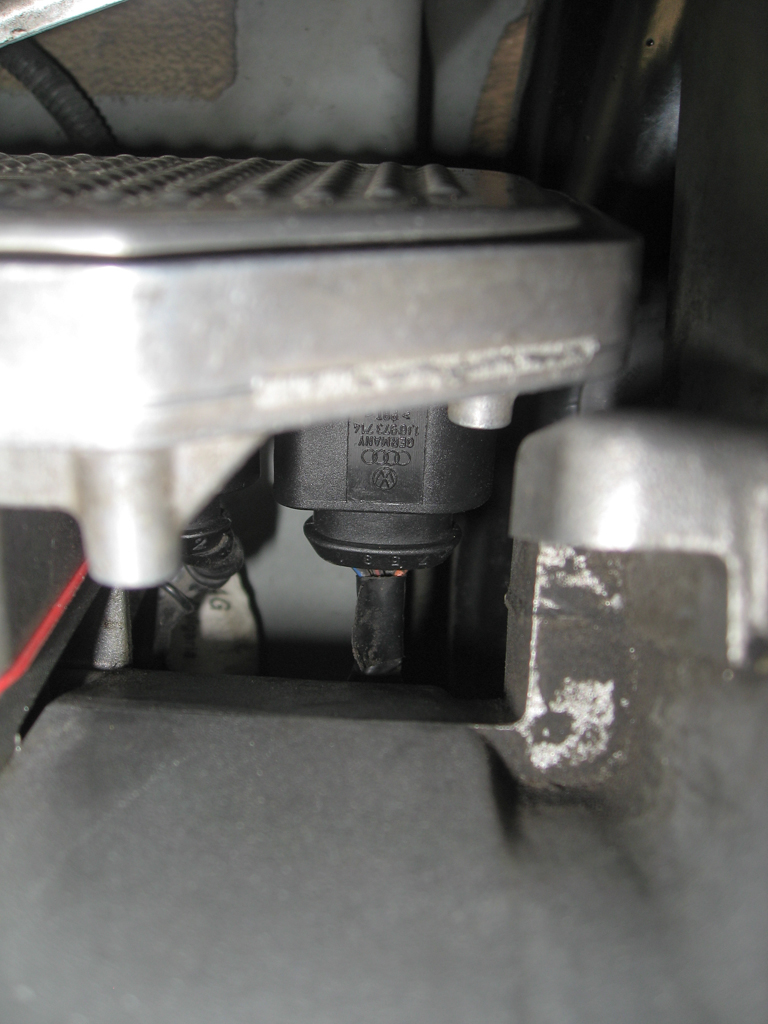
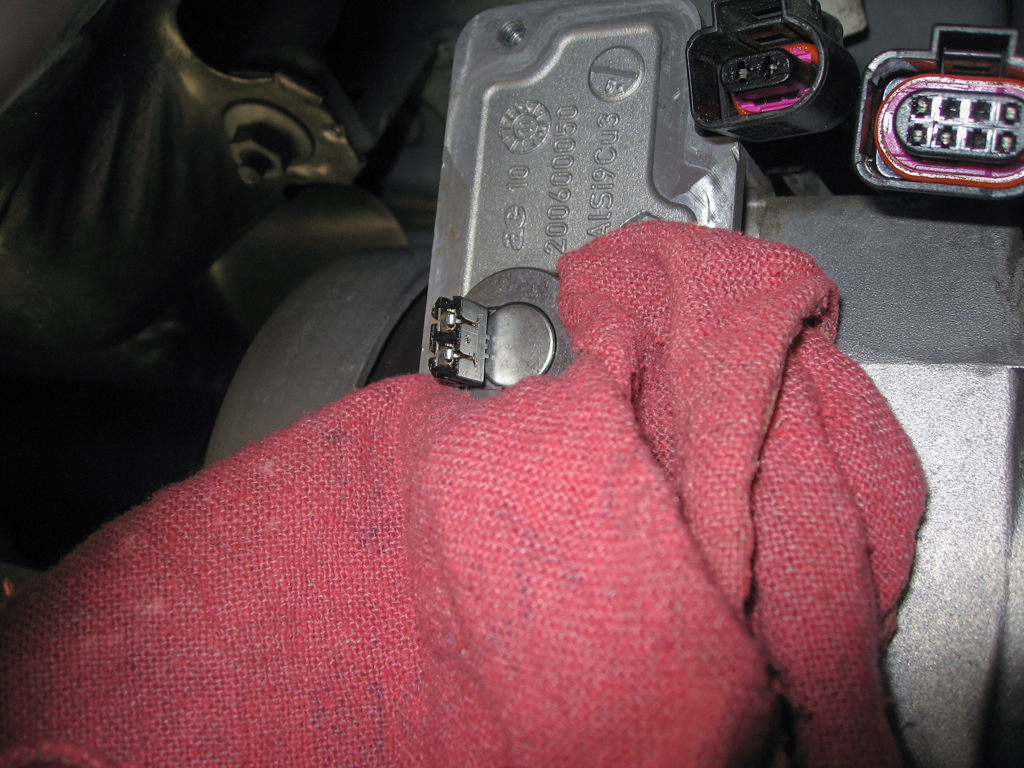
Here the controller is removed and the throttle valve is still seated in place. There isn't much of the barrel protruding from the coupling so if it is seated tightly you won't be able to pull it out with just your fingers.
Do NOT use the electrical connector for leverage... I know you're thinking about it ;)
If the coupling is still under pressure the throttle valve may just want to pop right out. If the throttle valve is loose then grab the new throttle valve in one hand and pull the old one out and slide the new one in. There is no specific orientation for this to go in, you'll note it spins in place.
You do need to make sure it it seated fully into the coupling. Press directly on the bottom of the barrel and it should sink another 1/8" into place.
You'll lose a small amount of fluid during the swap, maybe a tablespoon total. You don't have to be ninja-quick with this but don't do what I did the first time and pull the valve out with the new valve sitting on the workbench :)
If the throttle valve does not come out on its own you'll need to add some gentle persuasion. I used a set of channel locks with a shop rag wrapped around the jaws so as to not damage the throttle valve.
You don't need to use a ton of force to get the throttle valve out and you're not looking to remove it completely using the channel locks. Just use a little leverage to un-seat the valve body, maybe moving it out 1/8".
Then get the new valve and be ready for the swap. Pop the old one out, slide the new one in. There's no specific orientation for this to be installed, it rotates in place once in. You'll lose a small amount of fluid during the exchange, maybe a tablespoon total.
The barrel of the throttle valve seals deep in the chamber so there will be a small amount of Haldex fluid still running out. I very lightly blew some excess out with a can of compressed air and then wiped down any remaining excess on the outside with a shop rag.
After cleanup you're ready for reassembly. Note the orientation of the electrical connector on the throttle valve below. That matches the position on the controller. Rotate the throttle valve to this position, bring the controller up level with the valve, don't forget to put the red seal in place!
Then slowly mate the controller to the throttle valve. This may take a couple of tries, do not force it in and make sure the throttle valve stays correctly oriented. You'll notice that the sealing plate has 4 fingers that hold the throttle valve securely in place so as you tighten the controller those will ensure that the throttle valve is seated 100%.
Once the controller slides on you can start to thread the lower bolt back into place by hand and then tighten it until it's just about snug but not 100% tight. Then do the top bolt and then go back and tighten both all the way. I noticed that my upper bolt was loose when I started the entire procedure so I reinstalled both with a small amount of medium strength thread locker.
Reconnect the two electrical connectors. You can look up through the gap to see what you're doing.
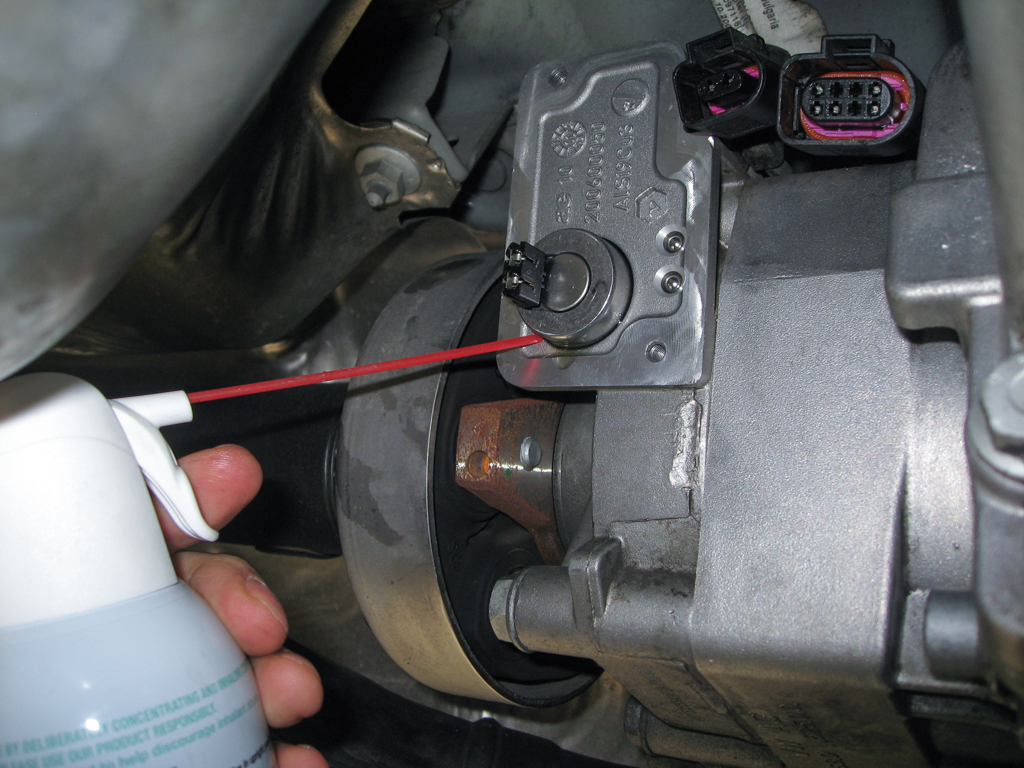
Depending on how much fluid you lost you may need to top off the Haldex fluid. The fill hole is to the right of the controller on the piece with the three large \ marks, sort of looks like an M I guess, just visible on the far right in this picture. It's a 5mm allen socket to remove.
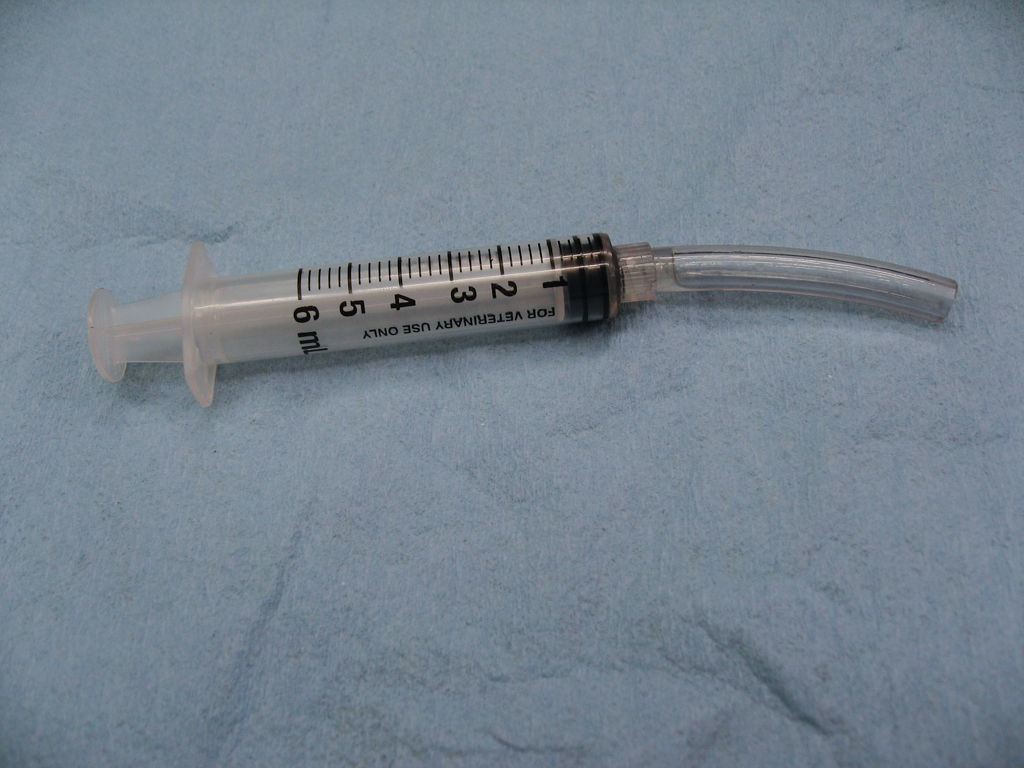
I used a small syringe with a short length of hose to refill about the same volume that I lost. The part # for the fluid for a Gen4 Haldex coupling is G-060-175-A2.
That's all there is to it. Double check the allen bolts and electrical connectors are tight and take it for a short test drive. Verify afterwards that there's no fluid leaking from the bottom of the controller.
No comments:
Post a Comment