I ordered the replacement switches from bkstuning.com. There are 3 different switch types available with varying amounts of aluminum trim. One of these mentions that it might require slight modification to work in a mk2 TT, the other two are plug and play. The set that I ordered worked out of the box, the part #s are 420 959 851 and 420 959 855. I believe the 420 code denotes these as being R8 parts.
The install is pretty easy to do, I think it took me about 45 minutes per side. The mk2 doors are way easier to get apart and back on than the mk1. The only tricky bit is working with the body clips that secure the door but even those are more forgiving than the typical clips.
Tools required (as far as I can remember):
- T10 torx
- T20
- T25
- Door panel removal tool
- Nylon trim tools
- small screwdrivers
Also if I was going to do this again I'd wrap the door panel tool with either cloth tape or electrical tape to minimize the chances of it gouging the paint under the door panel. Any scratches won't be visible but still ;)
The door is held on by two T25 torx screws, 9 clips and then the top edge is recessed into the door at the window seal. There are then electrical connections and the door release cable that will need to be undone before the panel is free.
First up remove upper speaker grille. You'll want to protect the leather on the armrest here too otherwise the corner of the speaker will dig into the leather (lesson learned the hard way). Start from the corner closest to the top of door handle and work around the top and down the sides. Then you'll be able to reach in and pop the lower center out.

Here you can see the reverse side and where the clips are located. They don't take much force to remove.

Here's what the speaker area looks like. Note the angle of the lower center one, that's why it's a little trickier to get it to release. There's a T25 torx in the upper corner that needs to be removed.


There's a second T25 screw to be removed in the map pocket recess.

You'll want to at least put some painters tape or other protective material around the perimeter of the door to protect the paint while prying the clips off. Try to get the tape tucked under the panel itself to get as much protected as possible.

Now start working the trim tools into the gap between the panel and the door at the lower corner. Once it's pried up a bit you'll be able to peak in and see the clip that holds the panel in place. Slide the door panel tool in the gap and get it in as close to straddling the clip as possible to maximize leverage. As you pop these clips out you want to make sure you've got the tool as close to the clip as possible to minimize any damage to the panel or clip.
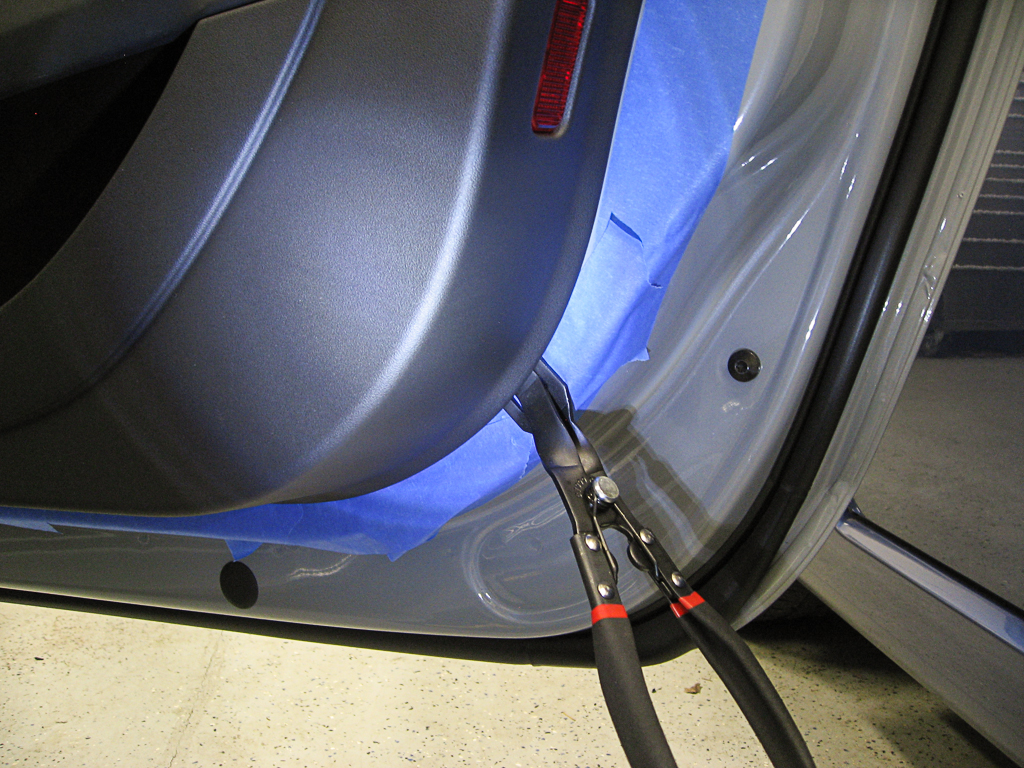
Work slowly and apply even force until the clip is popped and then start working up the door careful to pry as close to the clip as possible, there are 3 clips along this outside edge.
Next start working along the bottom edge. Note that when you look into the gap you'll first see clips that hold some wires in place, those aren't the door clips, they're further in (see pic below). Work from the outer edge to the inside edge, there are 3 clips.
Finally start working up the inner edge and release the two remaining clips. I was able to pop these by hand since it was too tight to get the tool in even with the door open all the way.
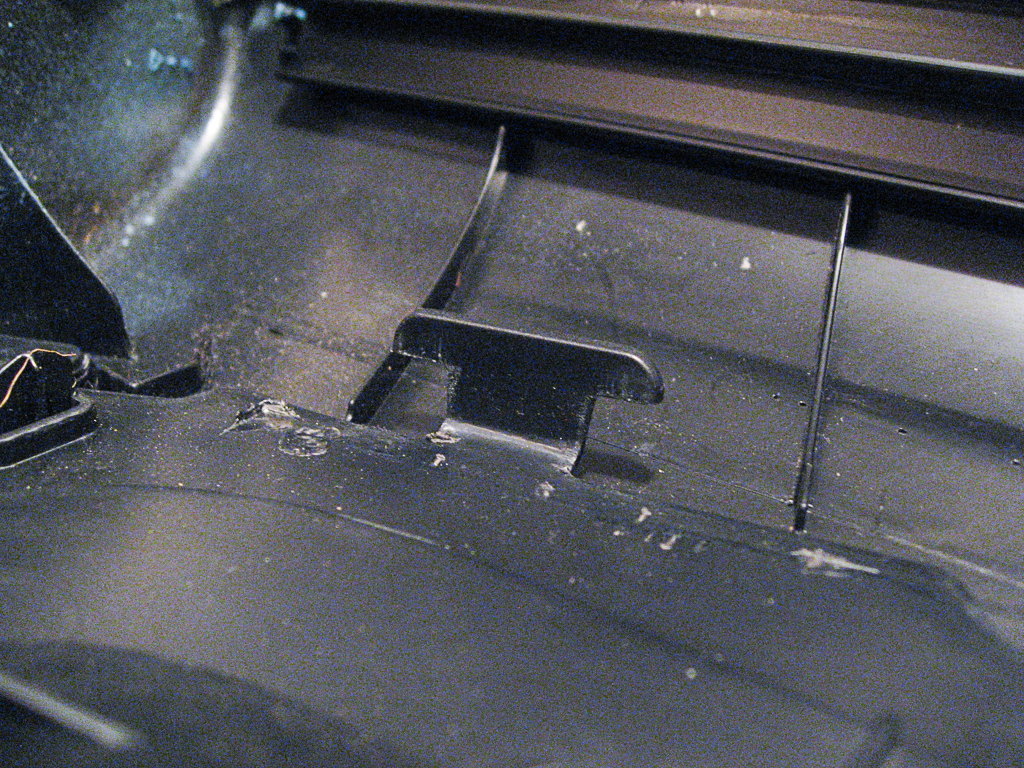
Here's a view with the panel removed so you can see the location of all of the clips. You can see how far inset the lower clips are in relation to the wire harness.

Two notes of caution with regards to these clips. Even if you think you're prying in the exact correct spot some of these are likely to stay in the door and pop out of the panel itself. That in itself is not horrible as the door panel is pretty resilient and the clips can be reseated later.
Secondly the manual states that the rubber seal around these clips is critical for sealing the door to keep the electronic components dry. If any of those seals are damaged the clips should be replaced.
Here you can see one of mine that was left behind.

Ok, with all of the clips out the door should now be hanging from the top edge in the window trim. Before you lift it off be sure that you're ready for the next steps or have something under the door panel to set it down on, or have a second set of hands to help you out :)
Lift the door panel straight up to clear the recess in the window trim but don't go too far as the panel is still connected to the door itself in a couple of locations.
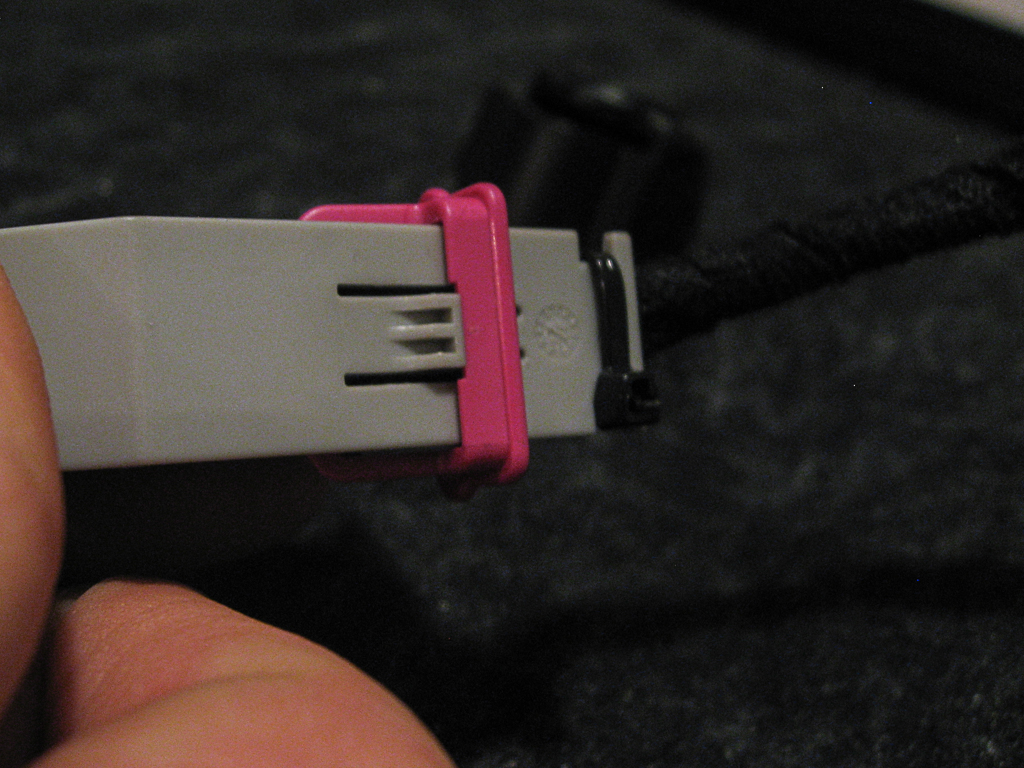
First reach in and undo the electrical connectors. These take a second to figure out but are easy to remove. Simply push on the raised tab to release the purple clip and then flip the clip up which will push the connector out of the plug. Do the same for any other connectors. If you have the power folding mirrors you'll have more connectors than just the window and mirror controls, and the passenger side will be different than the driver side.

Now you can remove the door release cable. Unhook the white plastic retainer and slide it back. This should then give you enough slack to pop the hook out of the door handle assembly and then the panel itself will be completely free of the door.

Set the panel down careful to protect the interior surface so that it doesn't get damaged, this is a good time to move the project inside the house :). Carefully remove any stuck clips with one of the nylon pry tools.
The back side of the door panel is covered with some thick felt padding. This is just tucked in some clips around the perimeter. Locate these and gently remove the padding from the panel. This will expose all of the internal screws and allow you access to the switches.

Next release the electrical connectors from the window switch and mirror control. These are the typical Audi electrical connectors with a tab that locks the connectors in place. Press on the tab and slide the connector out. If it's hard to remove the connector then you're doing it wrong, back off and try again. With the catch released they come out easily.
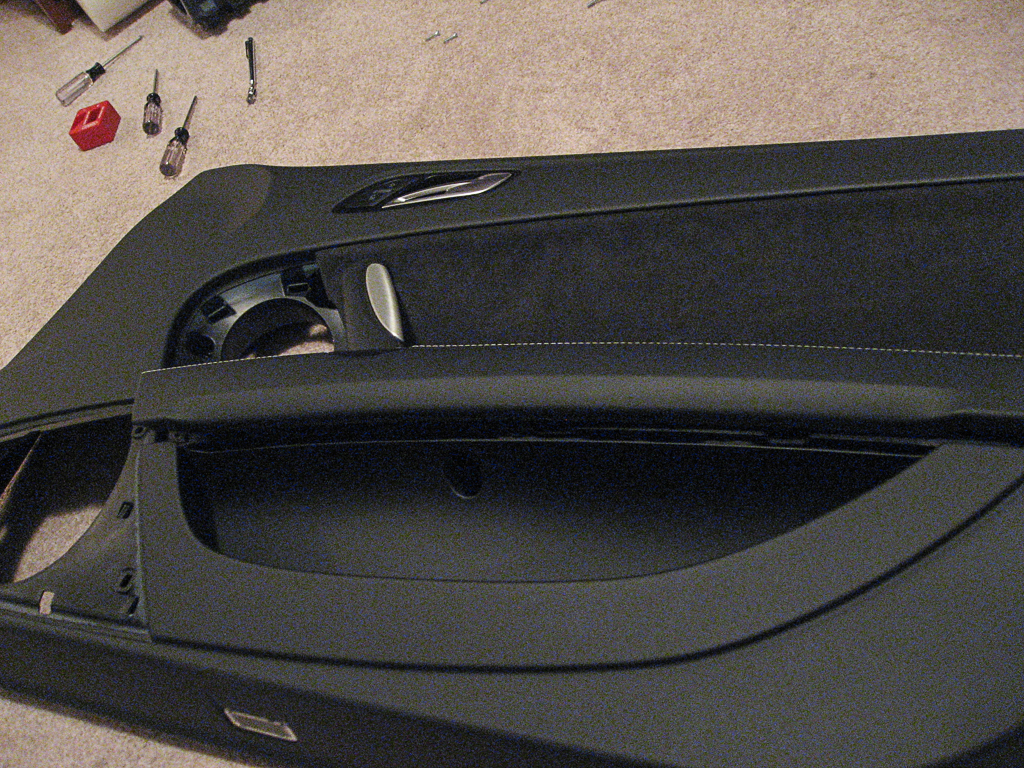
The window switches are held in a small plastic cradle which is clipped into the armrest. To get that all out the armrest has to be removed from the panel. Remove the 11 T10 screws holding the armrest and the 3 larger T20 screws holding the door pull in place. Keep track of where the 3 larger screws go. If you lose track you should be able to figure it out when you reassemble everything, they are only used to hold the door pull in place. Also these are all self tapping screws going into plastic so remove and reinstall slowly to not strip them out.
Flip the panel back over and start prying the armrest out. There will be some resistance since there is some adhesive still holding it in place. As you pull the armrest off of the panel the door pull will drop down out of the slot near the door handle. (note my lower speaker grille is removed here, you don't need to do that). Once the armrest is clear pull the door handle from the armrest and set aside.
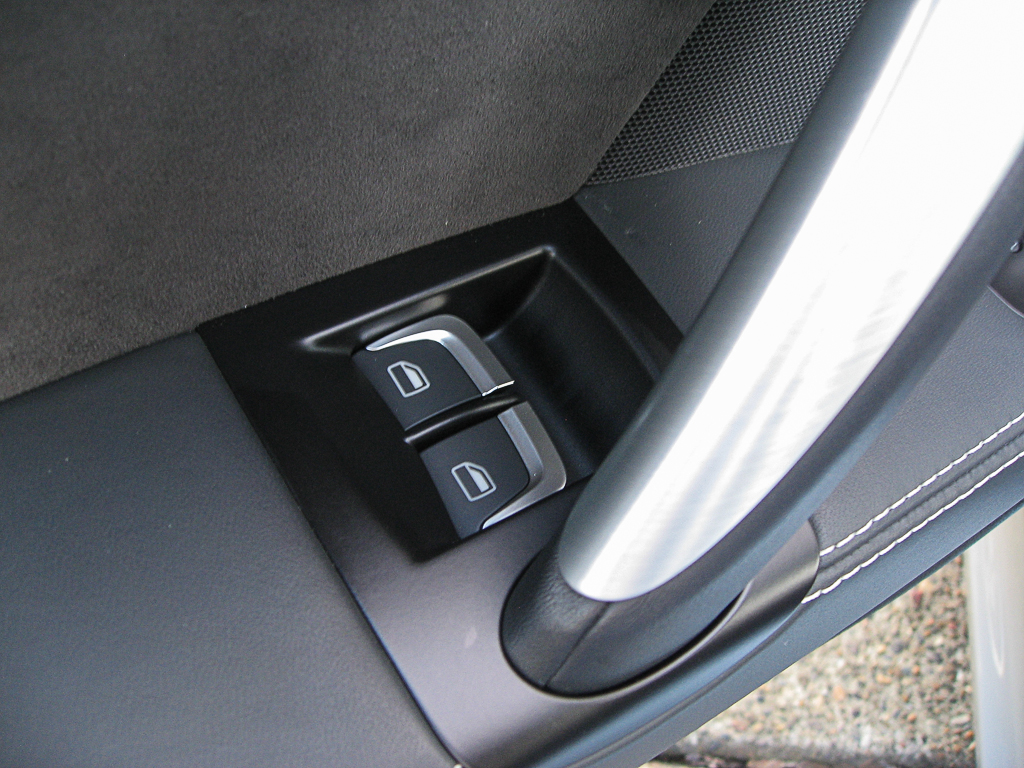
Now comes the fiddly bit that will take some patience (and those small screwdrivers). The switches are held in a cradle that is clipped into the armrest. This cradle has 4 catches that are easy to release and then it'll pivot out on the 5th catch.

Now flip over the switch assembly and if you look closely you'll see there are 4 clips that hold the switch into the cradle. You need to release all 4 of those while pushing the switch out the bottom of the cradle. This will take a little time and I don't have a really good technique other than using the small screwdrivers and the thin nylon trim tools. Typically when you get one side out the other will clip back in. Maybe inserting a sheet of paper or business card will help.
In any event once the switch is out it's easy enough to pop the new one in, make sure you get the correct orientation.
Then start the reassembly process following the reverse of the disassembly. Pop the switch cradle into the armrest and make sure all 4 clips are secure. Insert the door pull into the armrest and guide the armrest and door pull into place. Reinstall all of the torx screws making sure they all make it back into the correct spots. Reconnect any electrical connectors, making sure they are seated all the way.
Put padding back in place, tucking into all of the slots and over the hooks and feed the electric connectors and door release cable through the holes.
Now you should be ready to reattach the door panel to the door. I marked the location of all of the clips on the outside of the panel with some painters tape so I'd know where to apply pressure to get the clips reseated, it'll help a little bit.

Reattach the door cable release and slide the white clip back into place. Then reattach the electrical connectors. Now is a great time to test things out. Set the panel into the gutter at the top of the door and let it hang there and test out the window switches and mirror control. Don't forget that the mirror control won't work until you flip it to one side or the other ;)
If everything is working you can start popping the clips back in place. I just used the heel of my hand and gave the panel a swift smack to push them back in. You can compare to the other door to see if the gap is closed enough to indicate that the clips are fully seated.
Start at the inner top and work down to the bottom getting all 3 clipped in. Then do the outside edge, again top to bottom. Finally the lower clips across the bottom. These are the trickiest to get because of the gap between the map pocked and the inner door panel.
Finally, reinstall the 2 T25 screws and push the speaker grille back into place. Being careful not to damage the armrest.
Then you can sit back and admire the results before starting on the other side :)
2 comments:
Excellent video
It's so well explained
Post a Comment